HOLO+FACE Reservation Guide !
2025-02-06
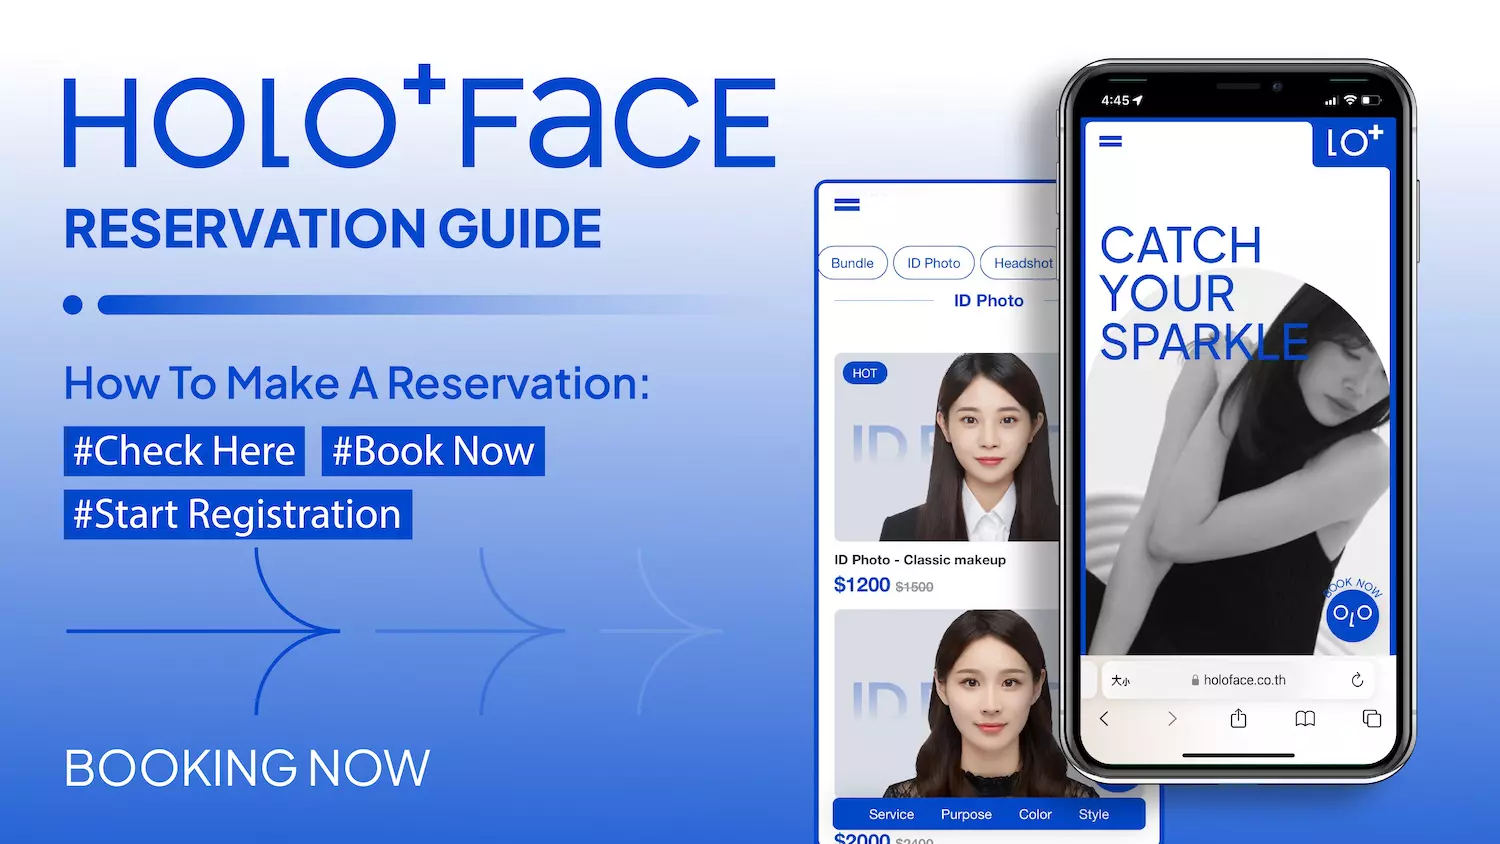
HOLO+FACE Values Customer “Experience” and “Satisfaction”
HOLO+FACE is dedicated to providing a one-stop, star-quality photography experience. To enhance the overall customer experience, we’ve developed the HoloONE appointment system, integrating online and offline services seamlessly. We will guide you step-by-step on how to make your booking!
Quick Booking Steps ◔.̮◔✧
-
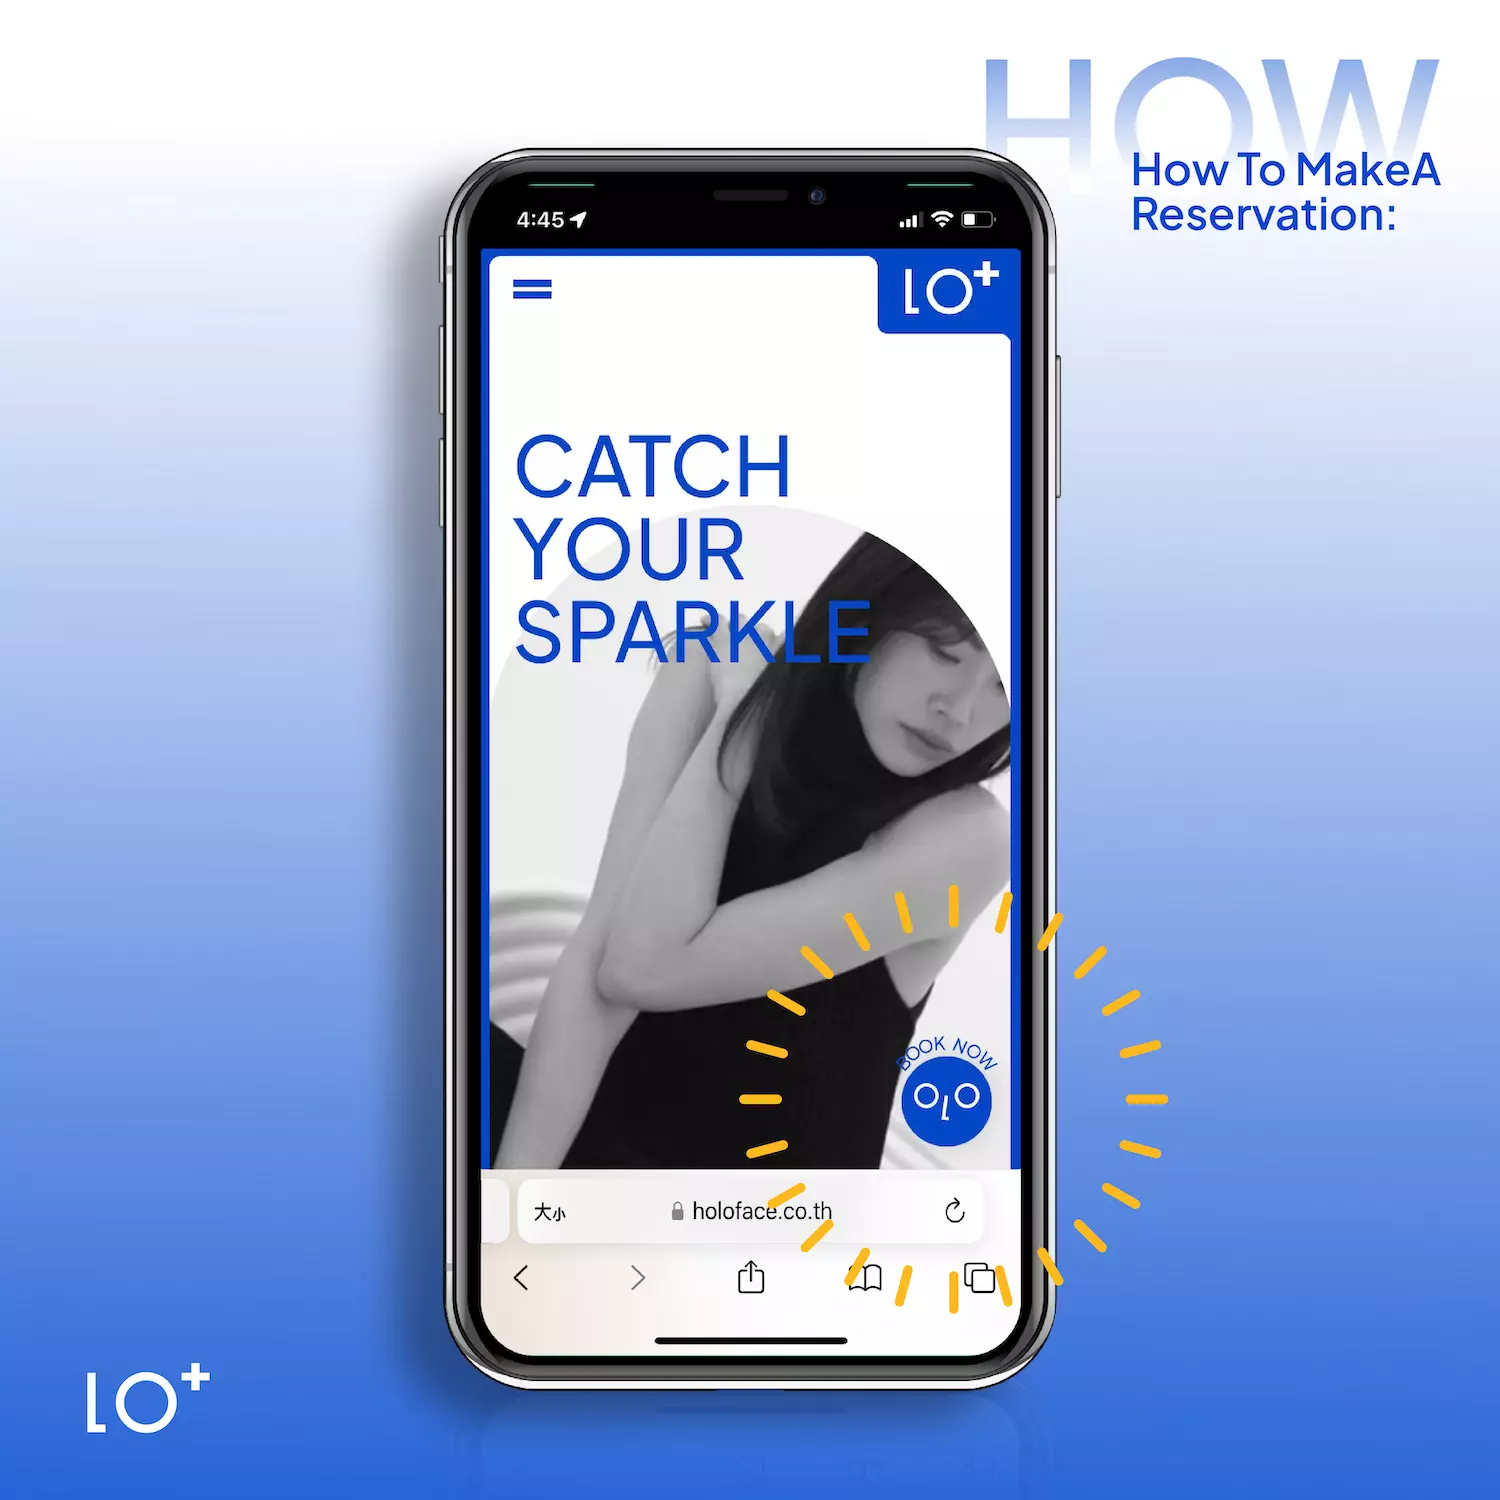
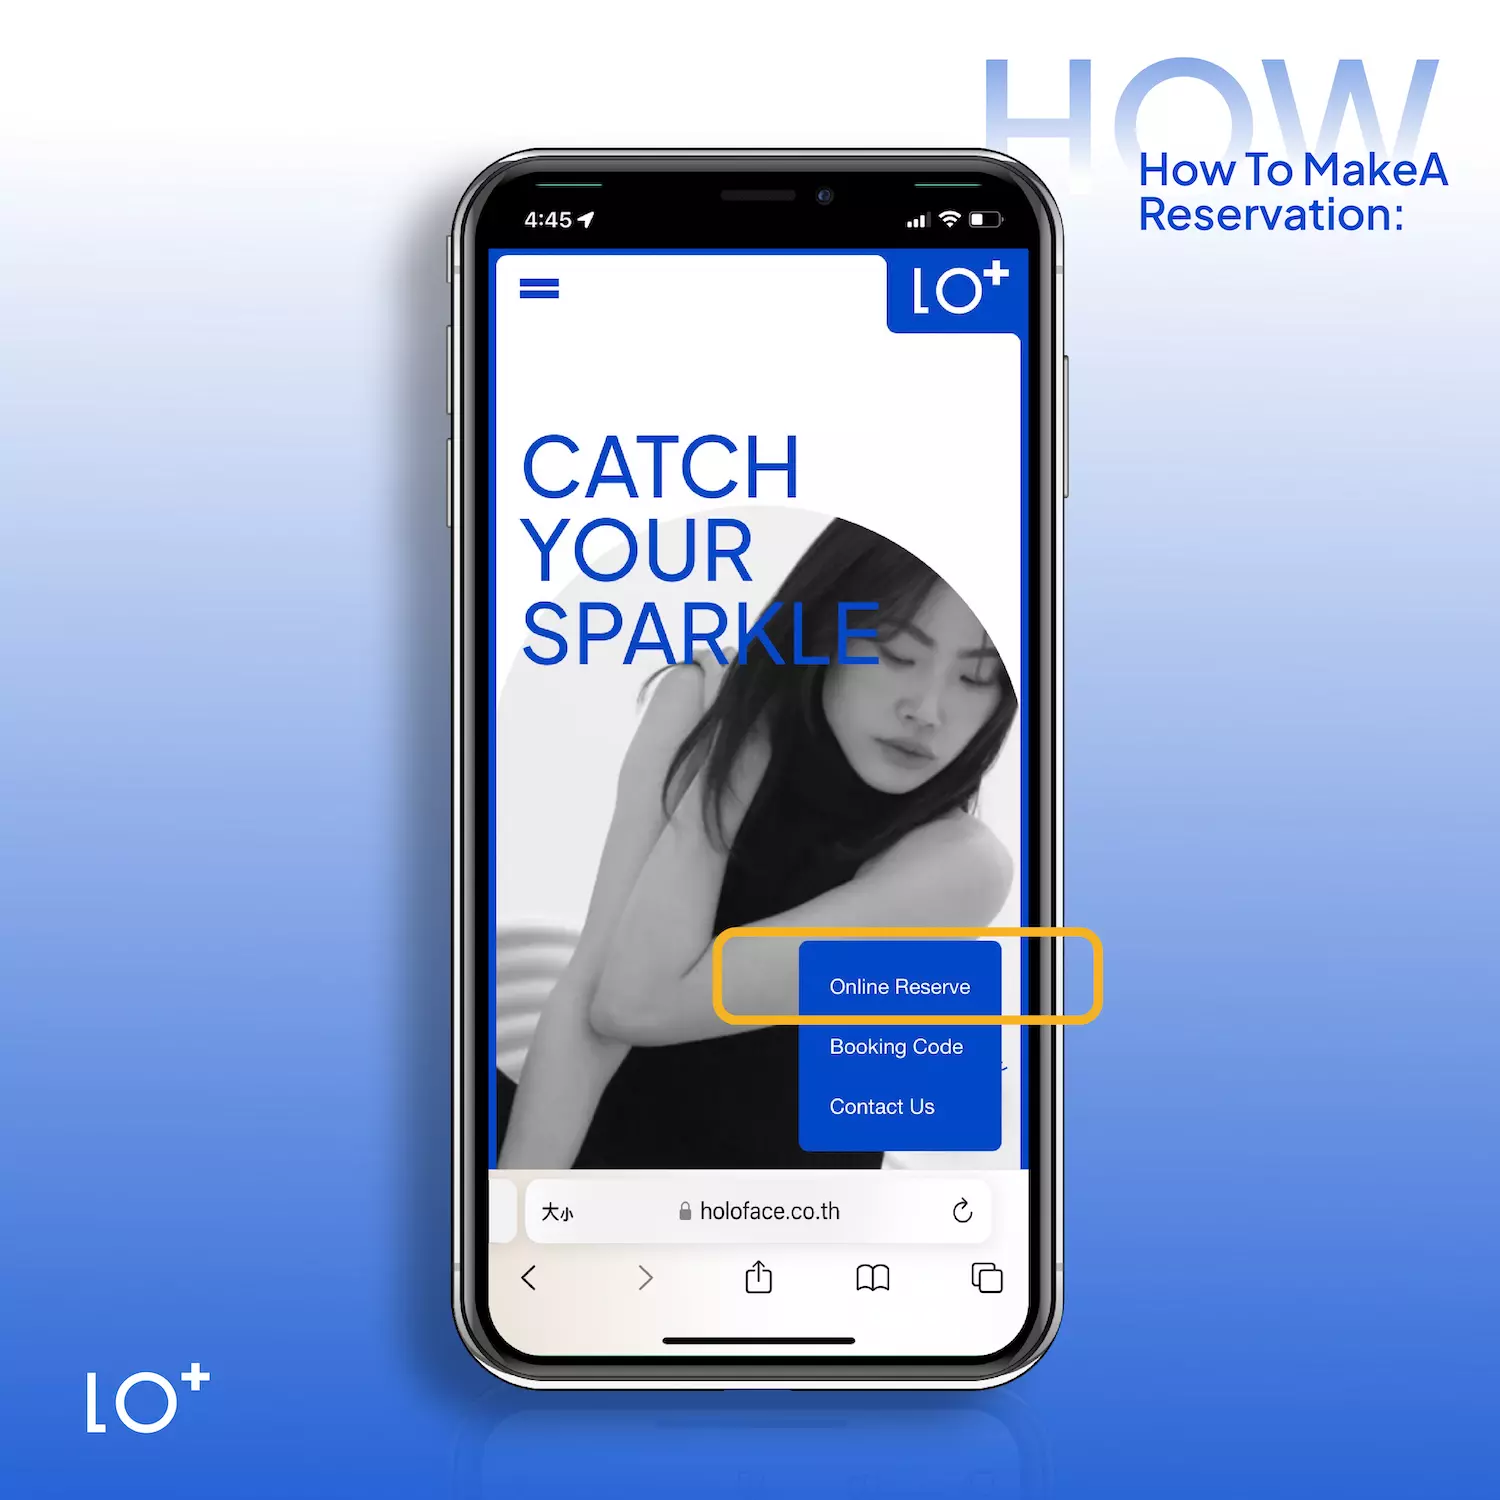
STEP 01|Visit Our Website and Click “Book Now”
Go to our website and click the small icon at the bottom right corner. Select “Online Reserve,” and you’ll be directed to all product pages.
-
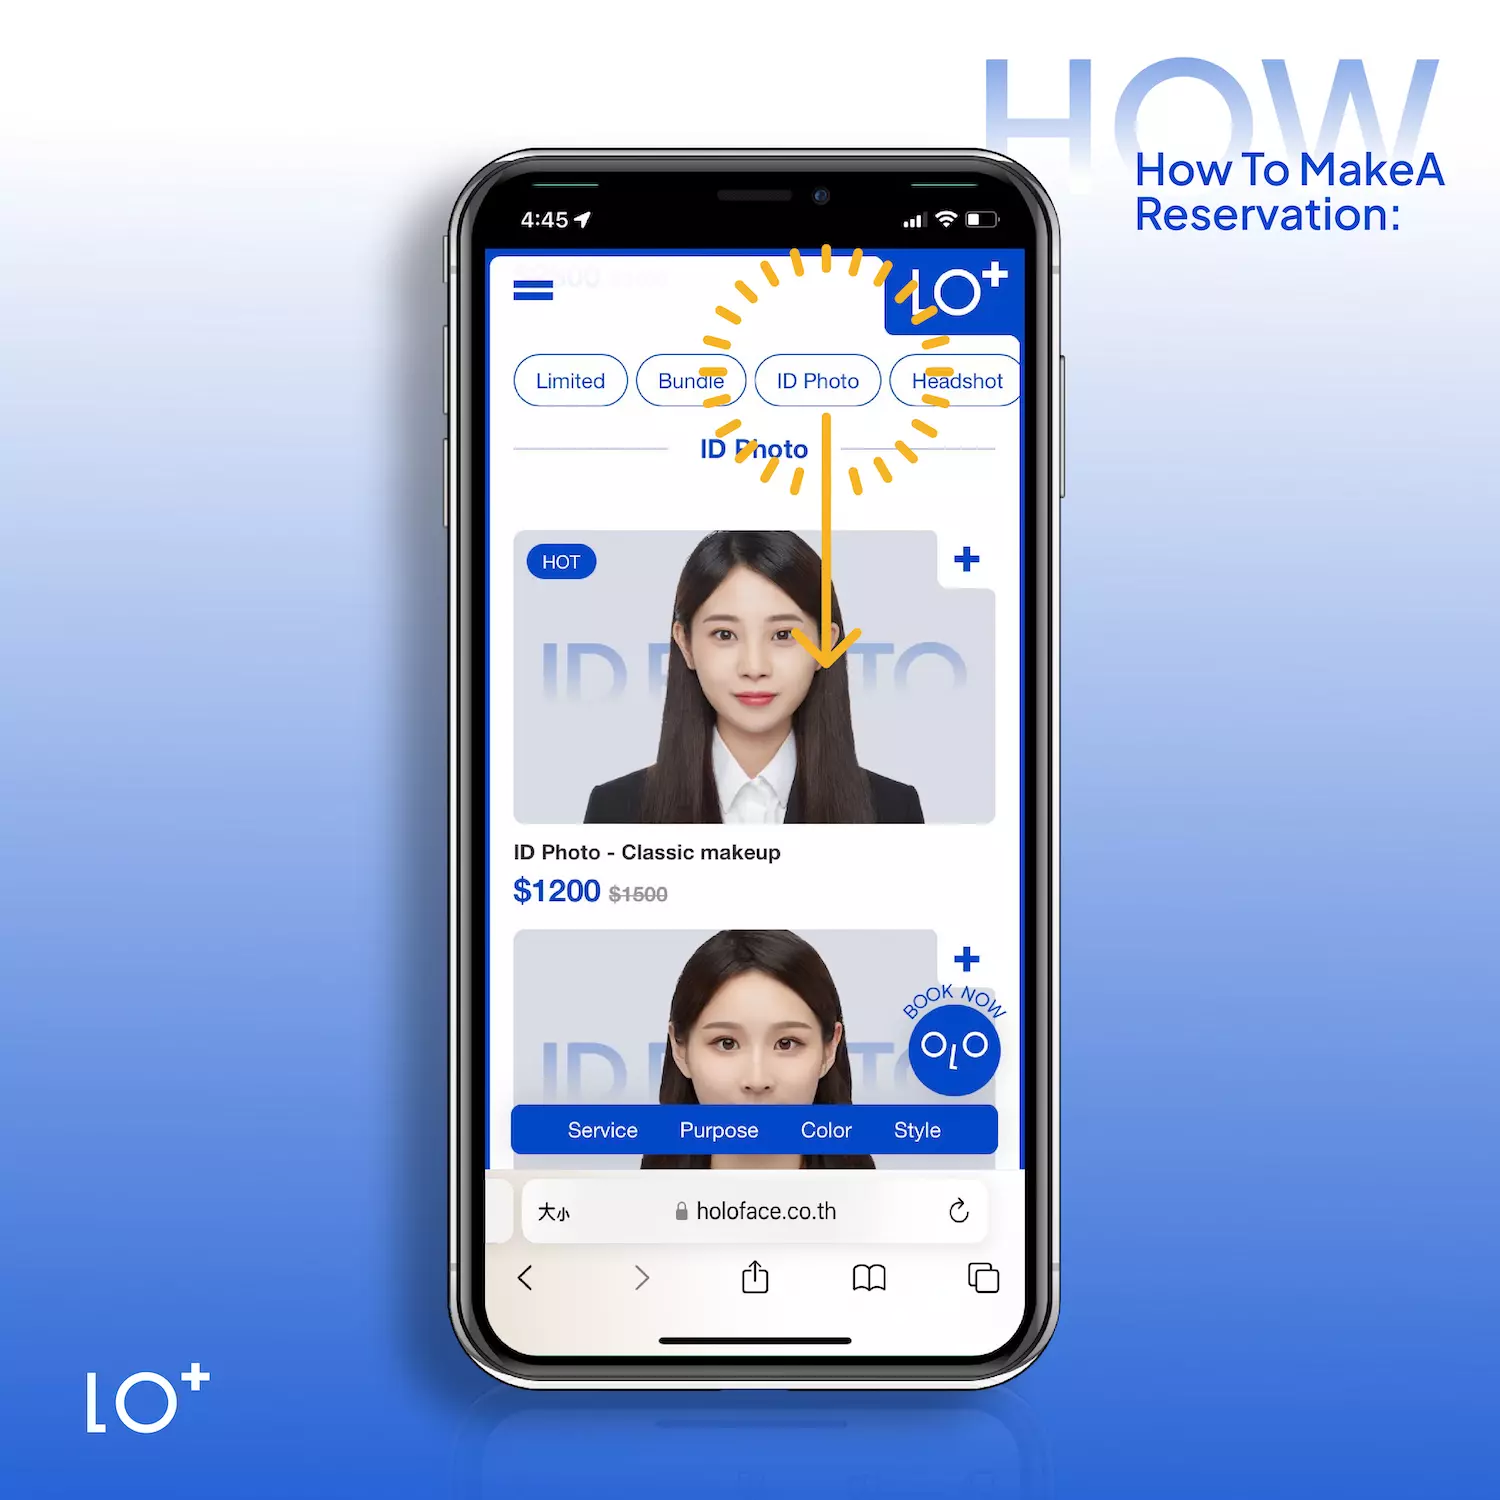
STEP 02|Choose Your Desired Service
Use the top navigation bar to browse categories by swiping left or right. Click on a category to quickly locate your desired service.
Once you’ve selected your service, click it to access its booking page.
-
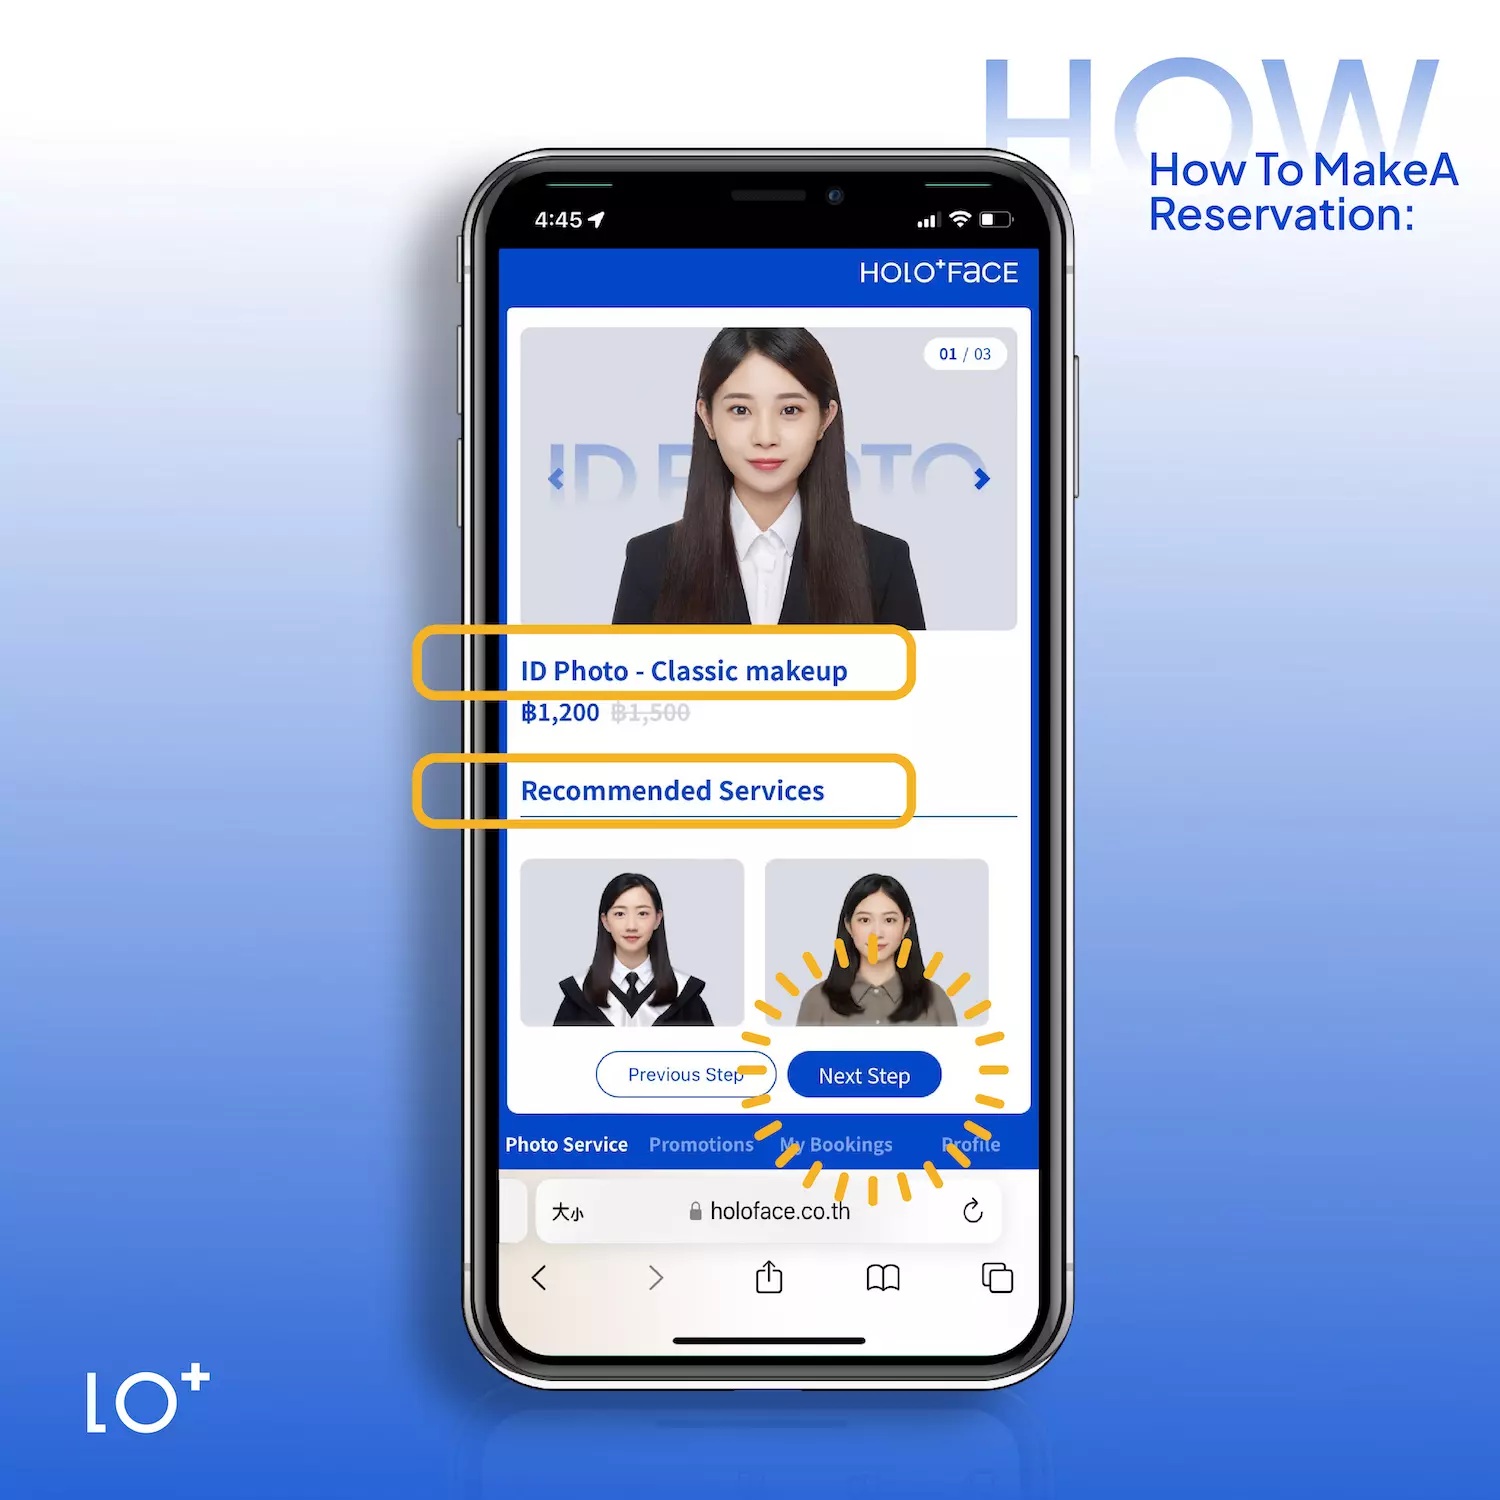
STEP 03|Product Booking Page
Swipe left or right on the images to view sample works for the chosen service. Additional add-ons are available by clicking “Add-on Services.”
Scroll down for a detailed description of the service, key notes, and more portfolio references. Once confirmed, click “Next” to proceed to branch selection and time scheduling.
-
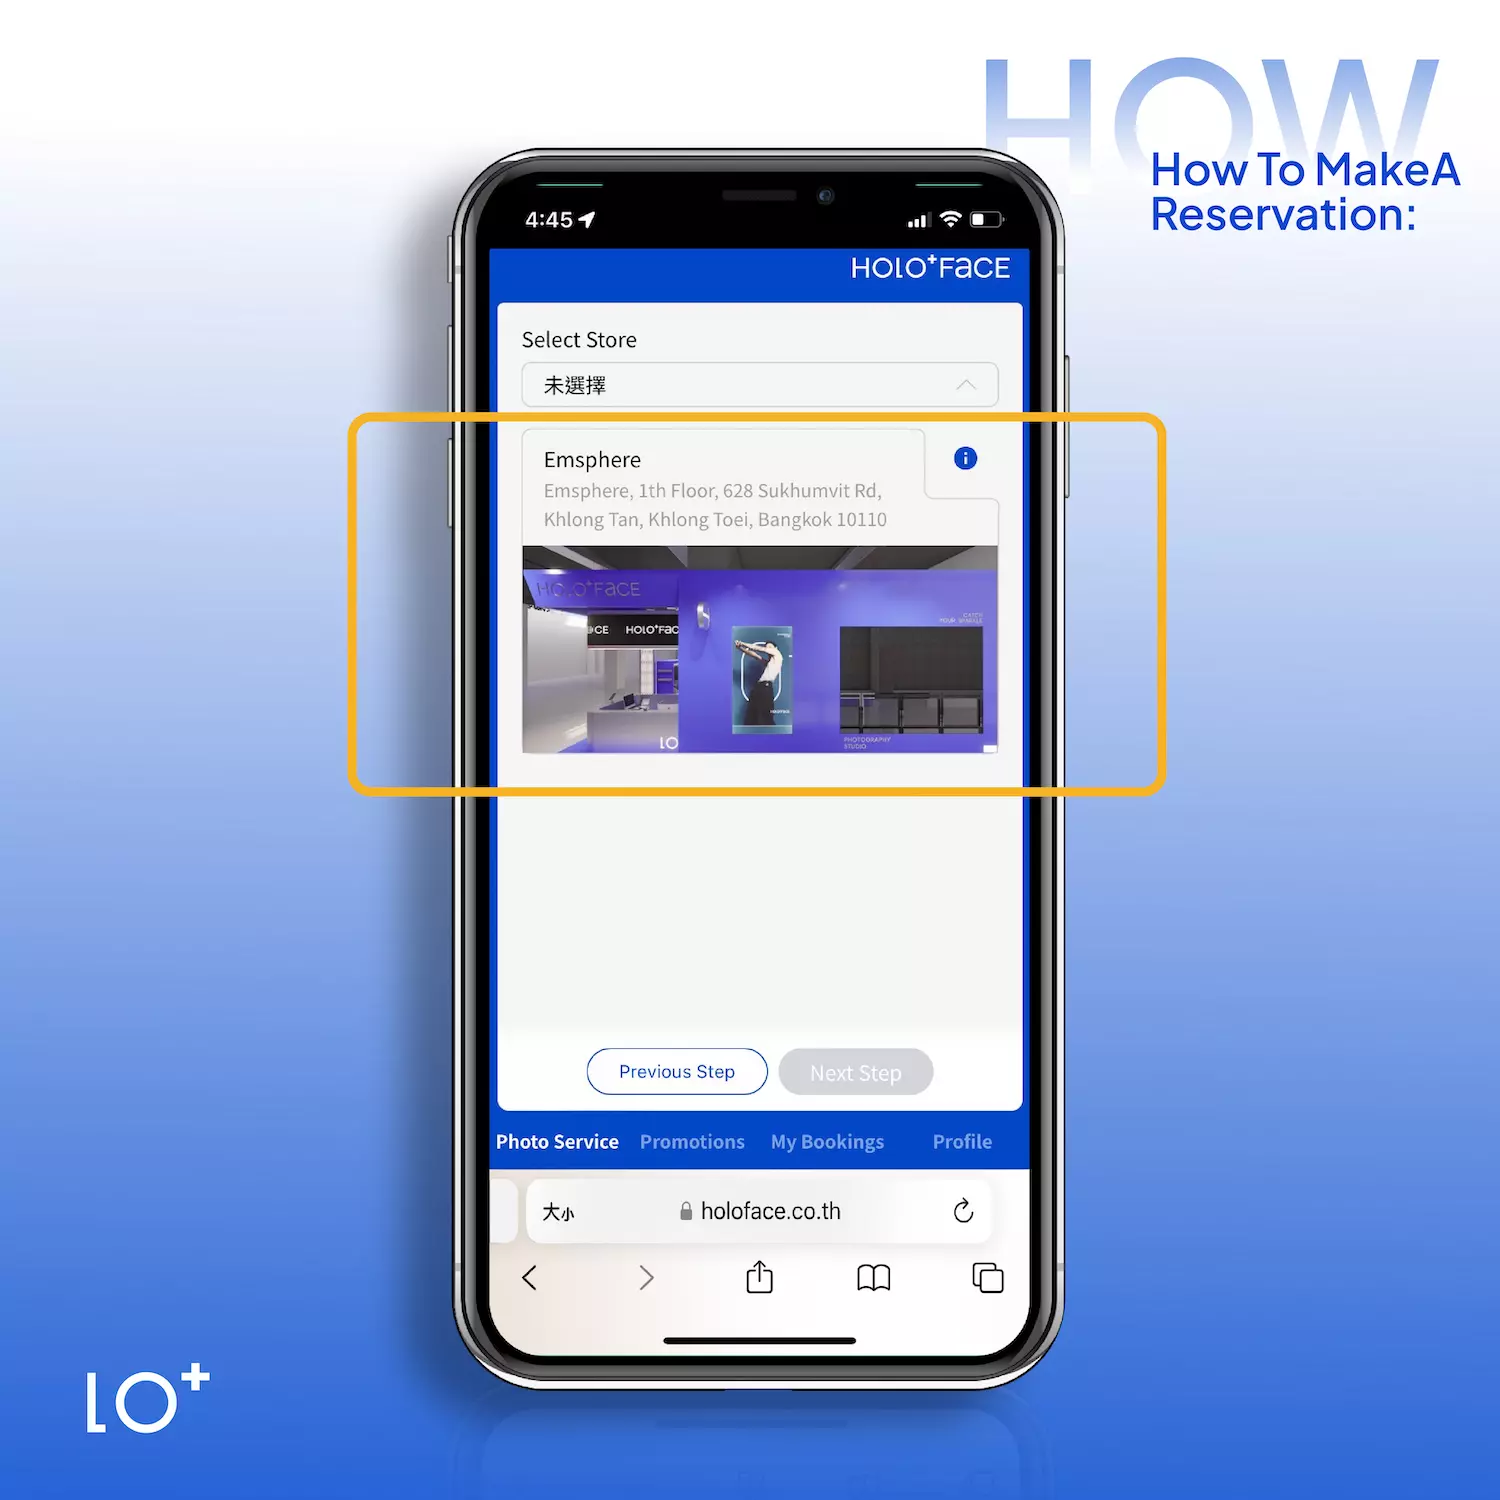
STEP 04|Select a Branch
Choose your preferred branch for the shoot. Click the image or the “i” icon on the right to look up more detailed information.
-
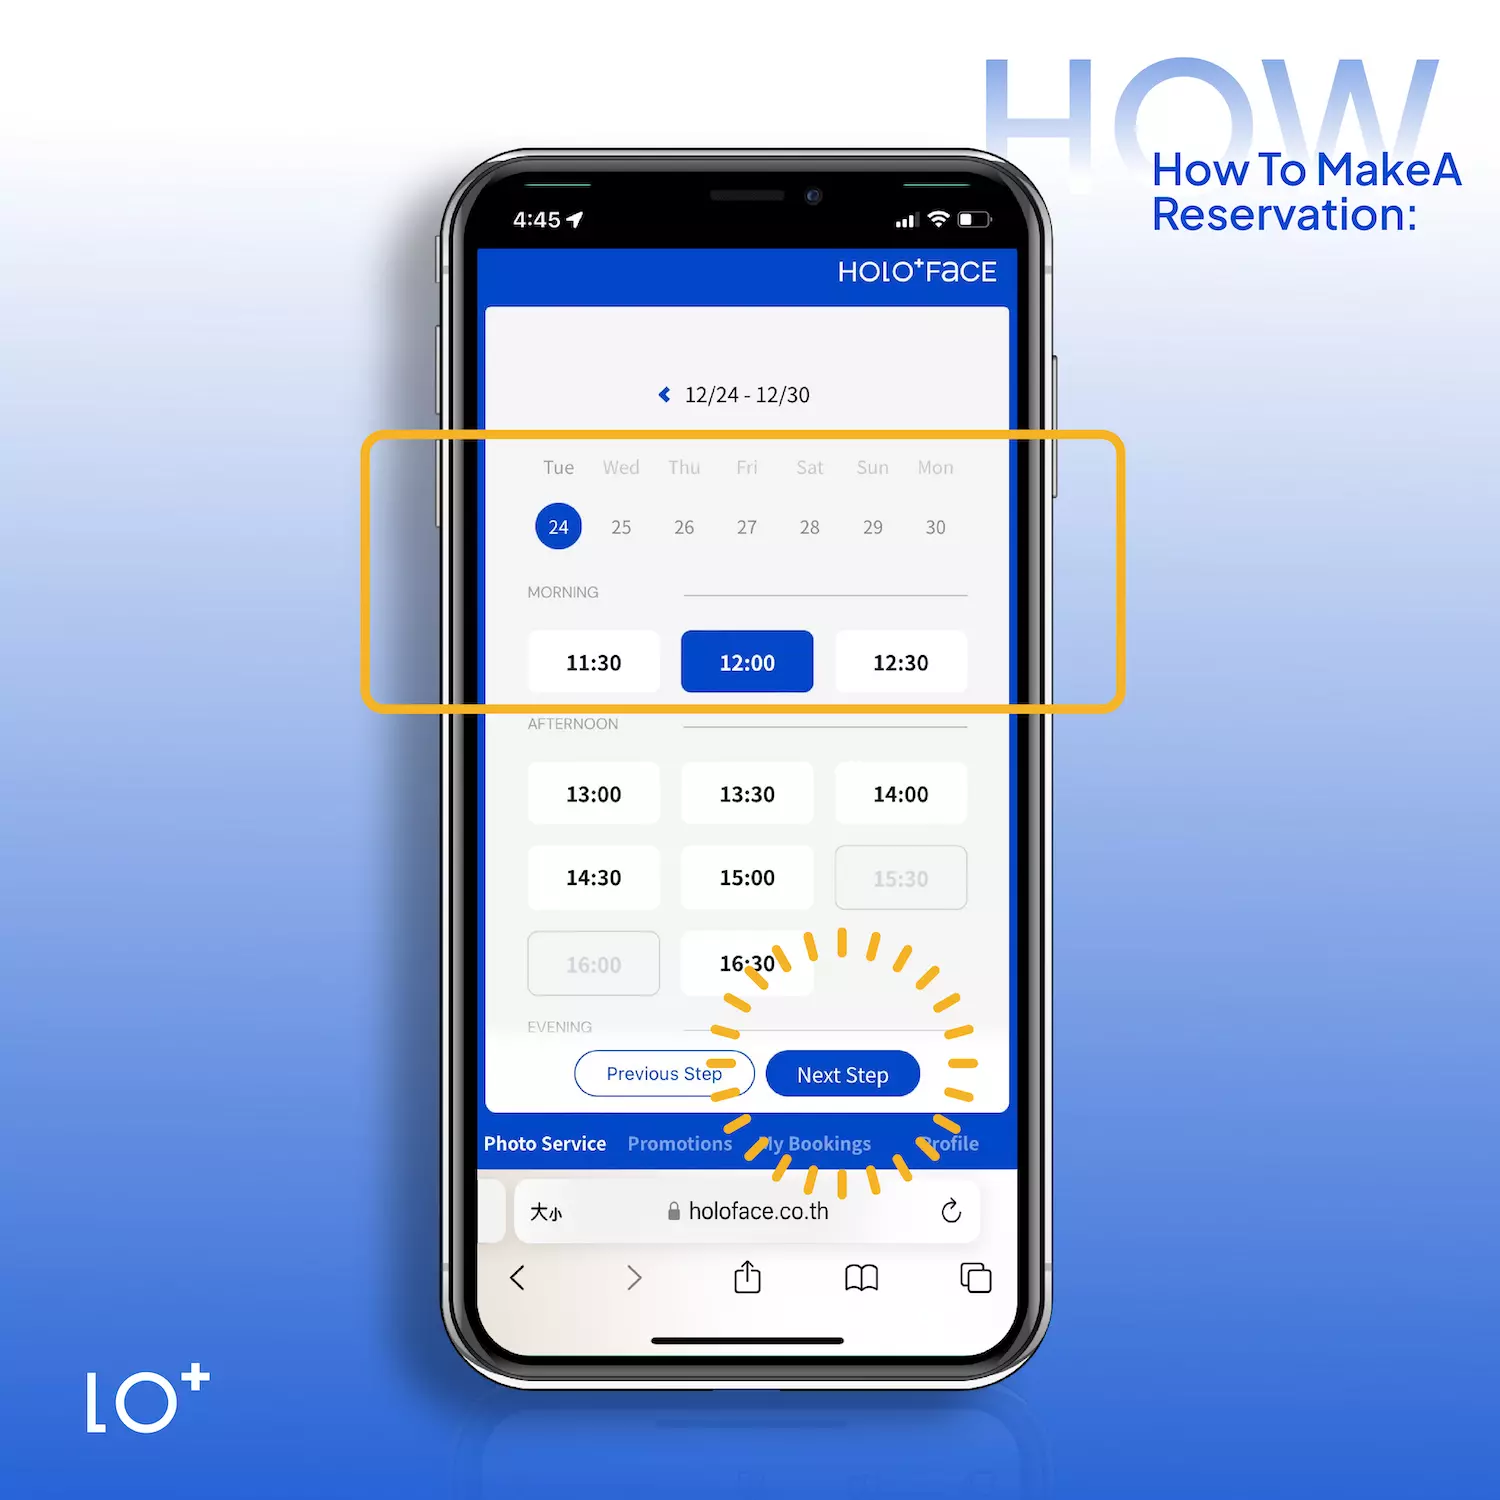
STEP 05|Pick a Date
Once you select a date, available time slots will appear below.
If all preferred slots are taken, you can switch to another convenient branch. After selecting your time, confirm the branch and time, then click “Next.”
-
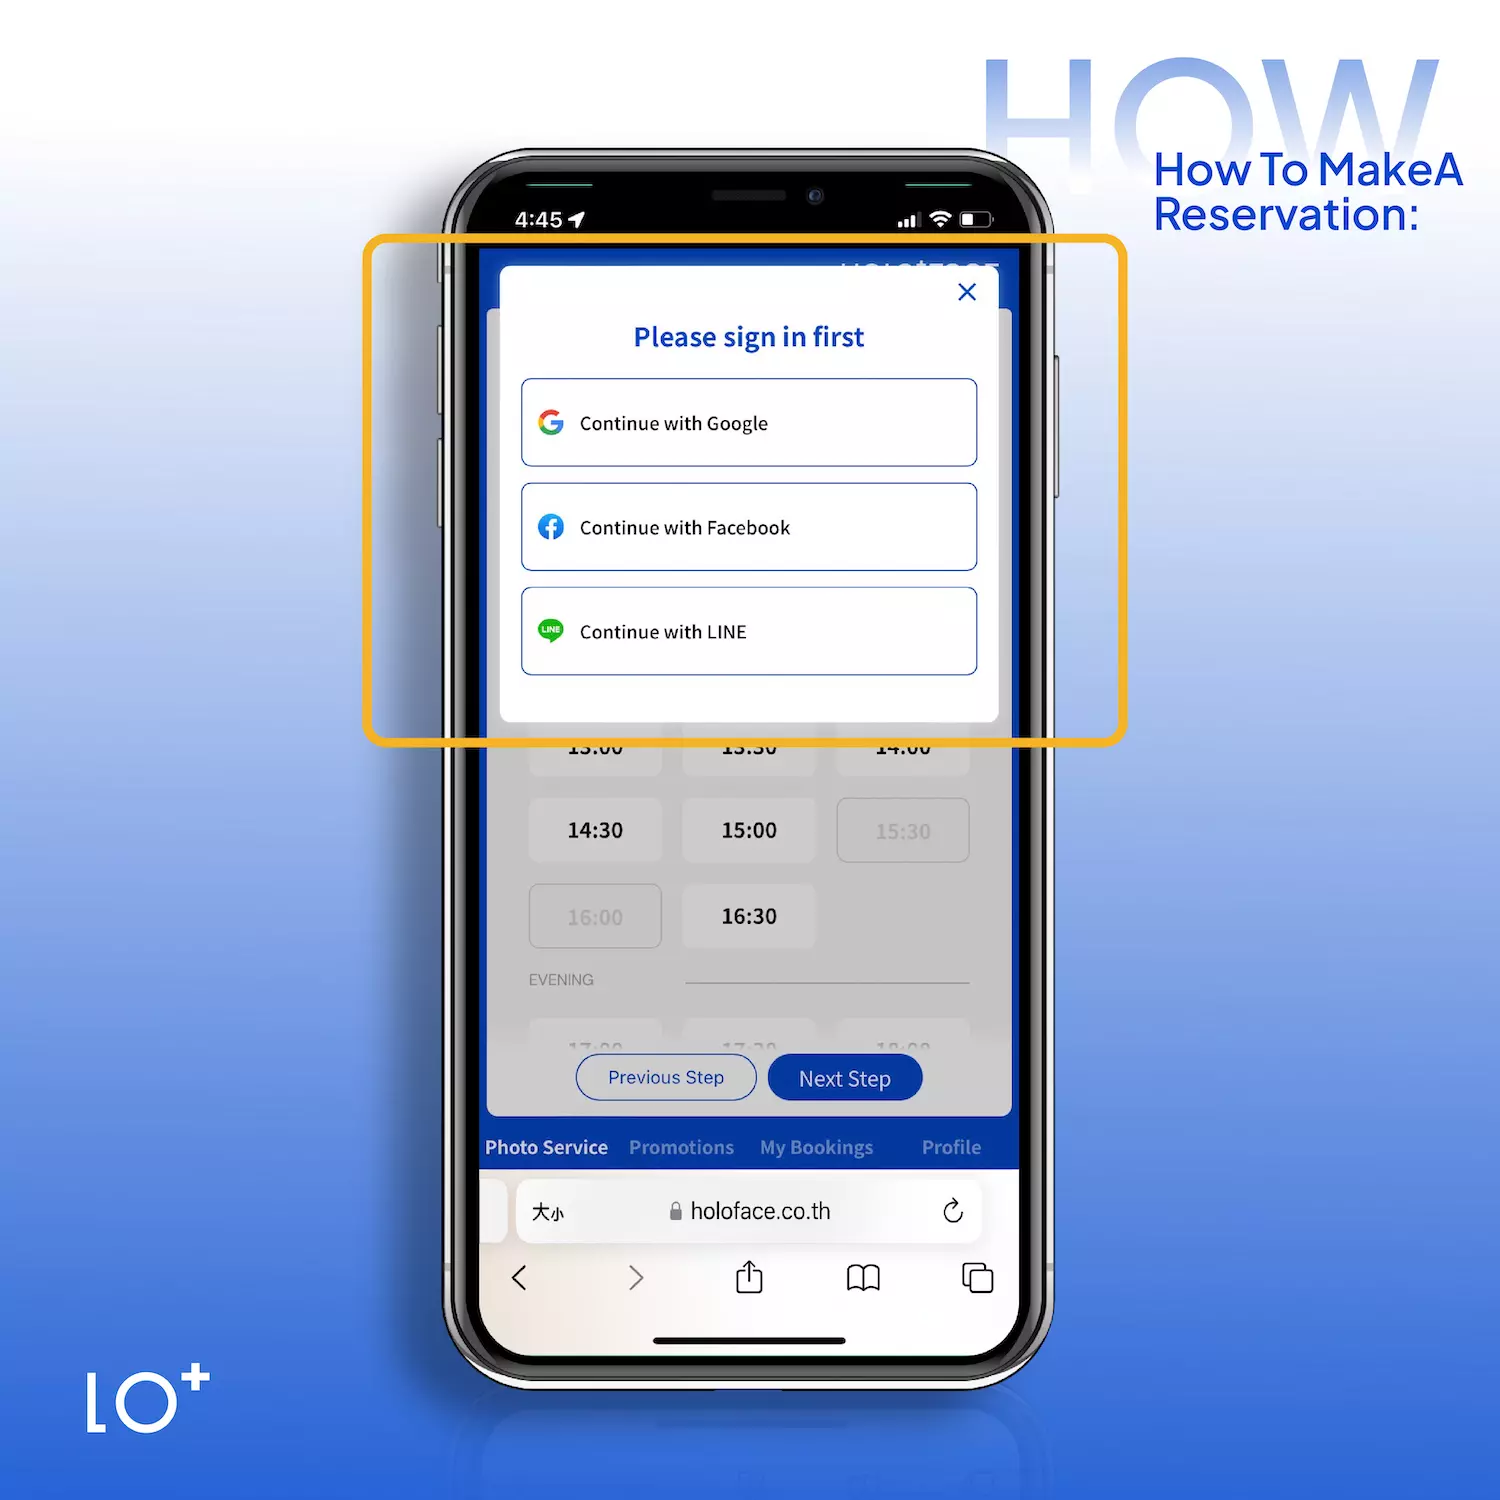
STEP 06|Create an Account or Log In
Please choose from Google, Facebook, or LINE to create an account first. After logging in, you’ll gain access to booking details, photo progress tracking, and be able to view and download digital files online.
If you already have an account, log in the same way you created the account.
-
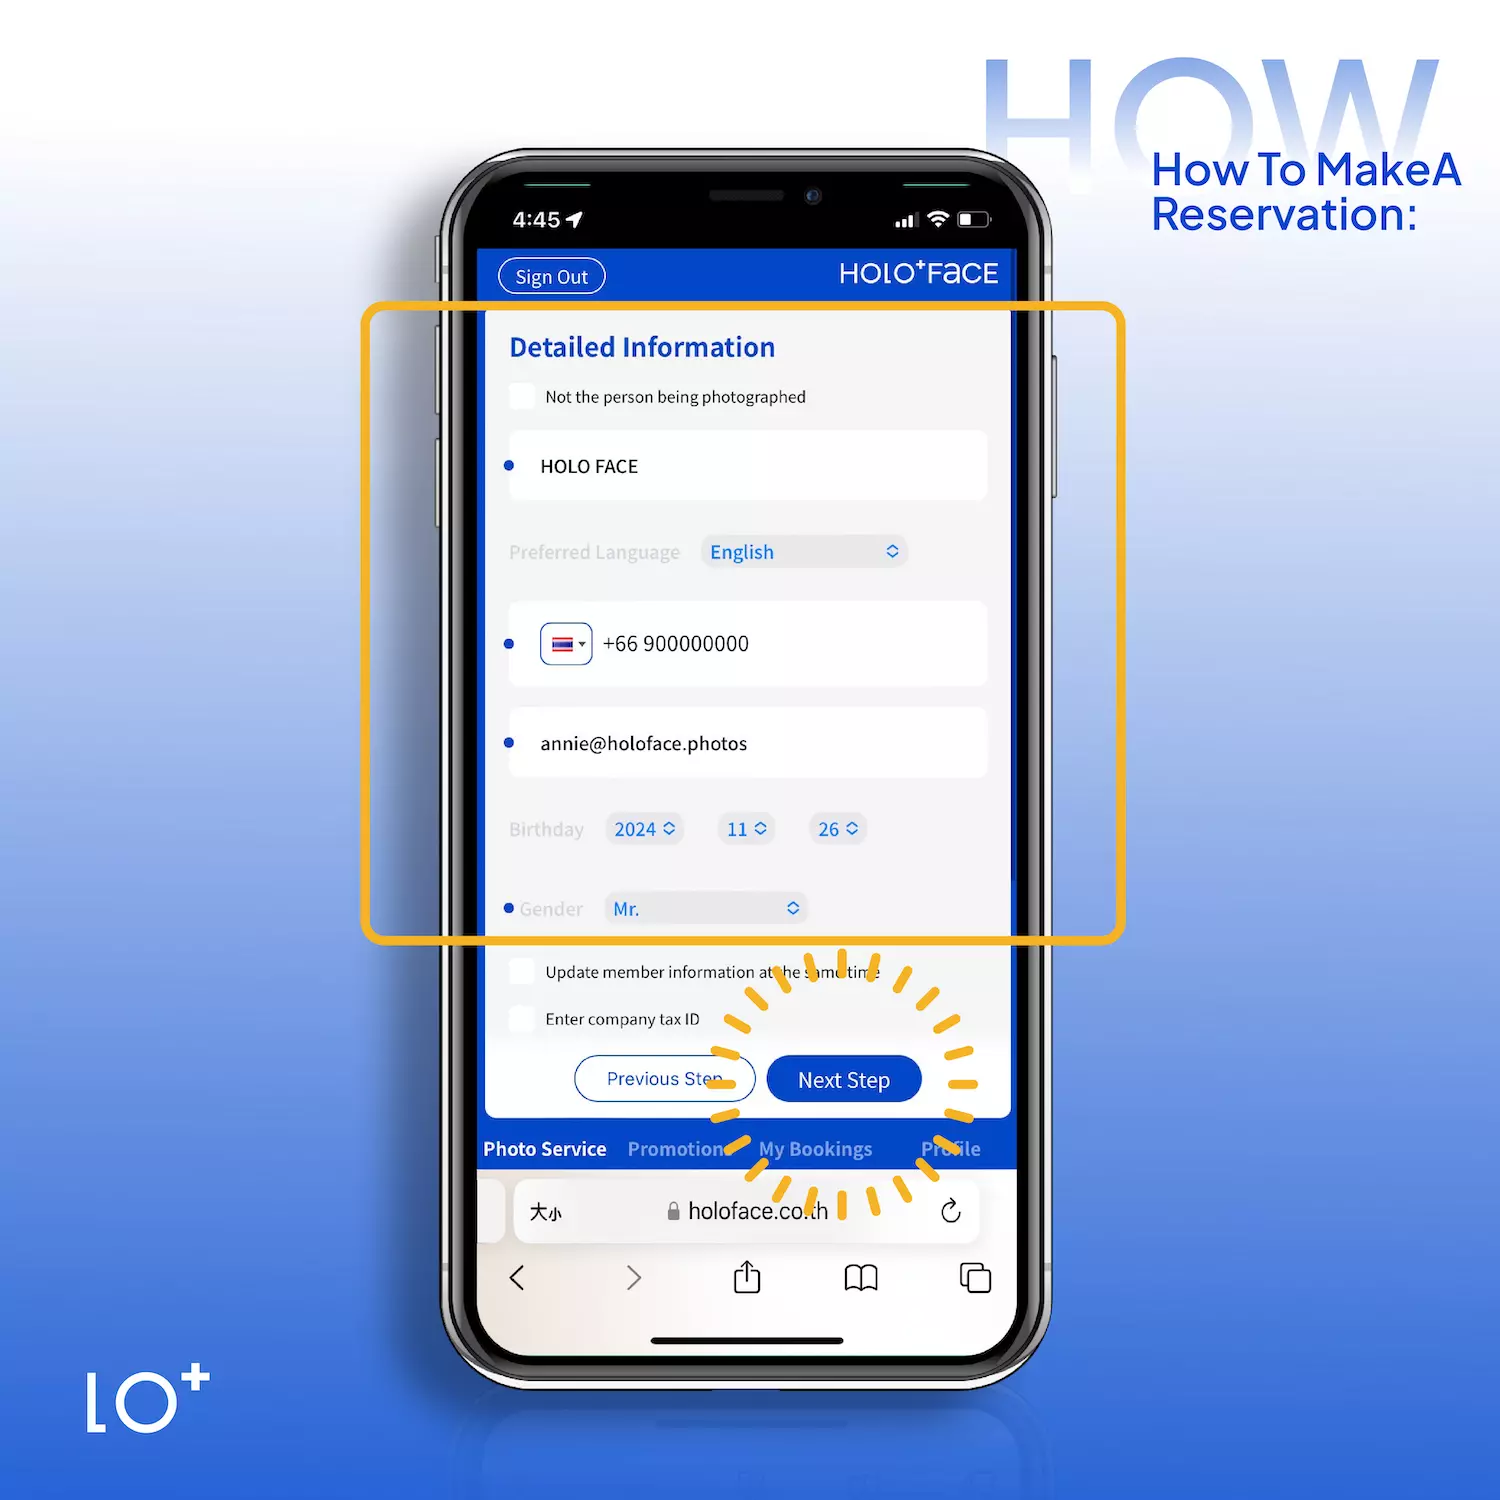
STEP 07|Update Member Information
Review your personal details for this appointment. Your email and phone number will be used for confirmation notifications and future services.
If you’ve registered before, your information will auto-fill. To update it, check “Update Member Information” in the lower-right corner. If everything is correct, click “Next.”
-
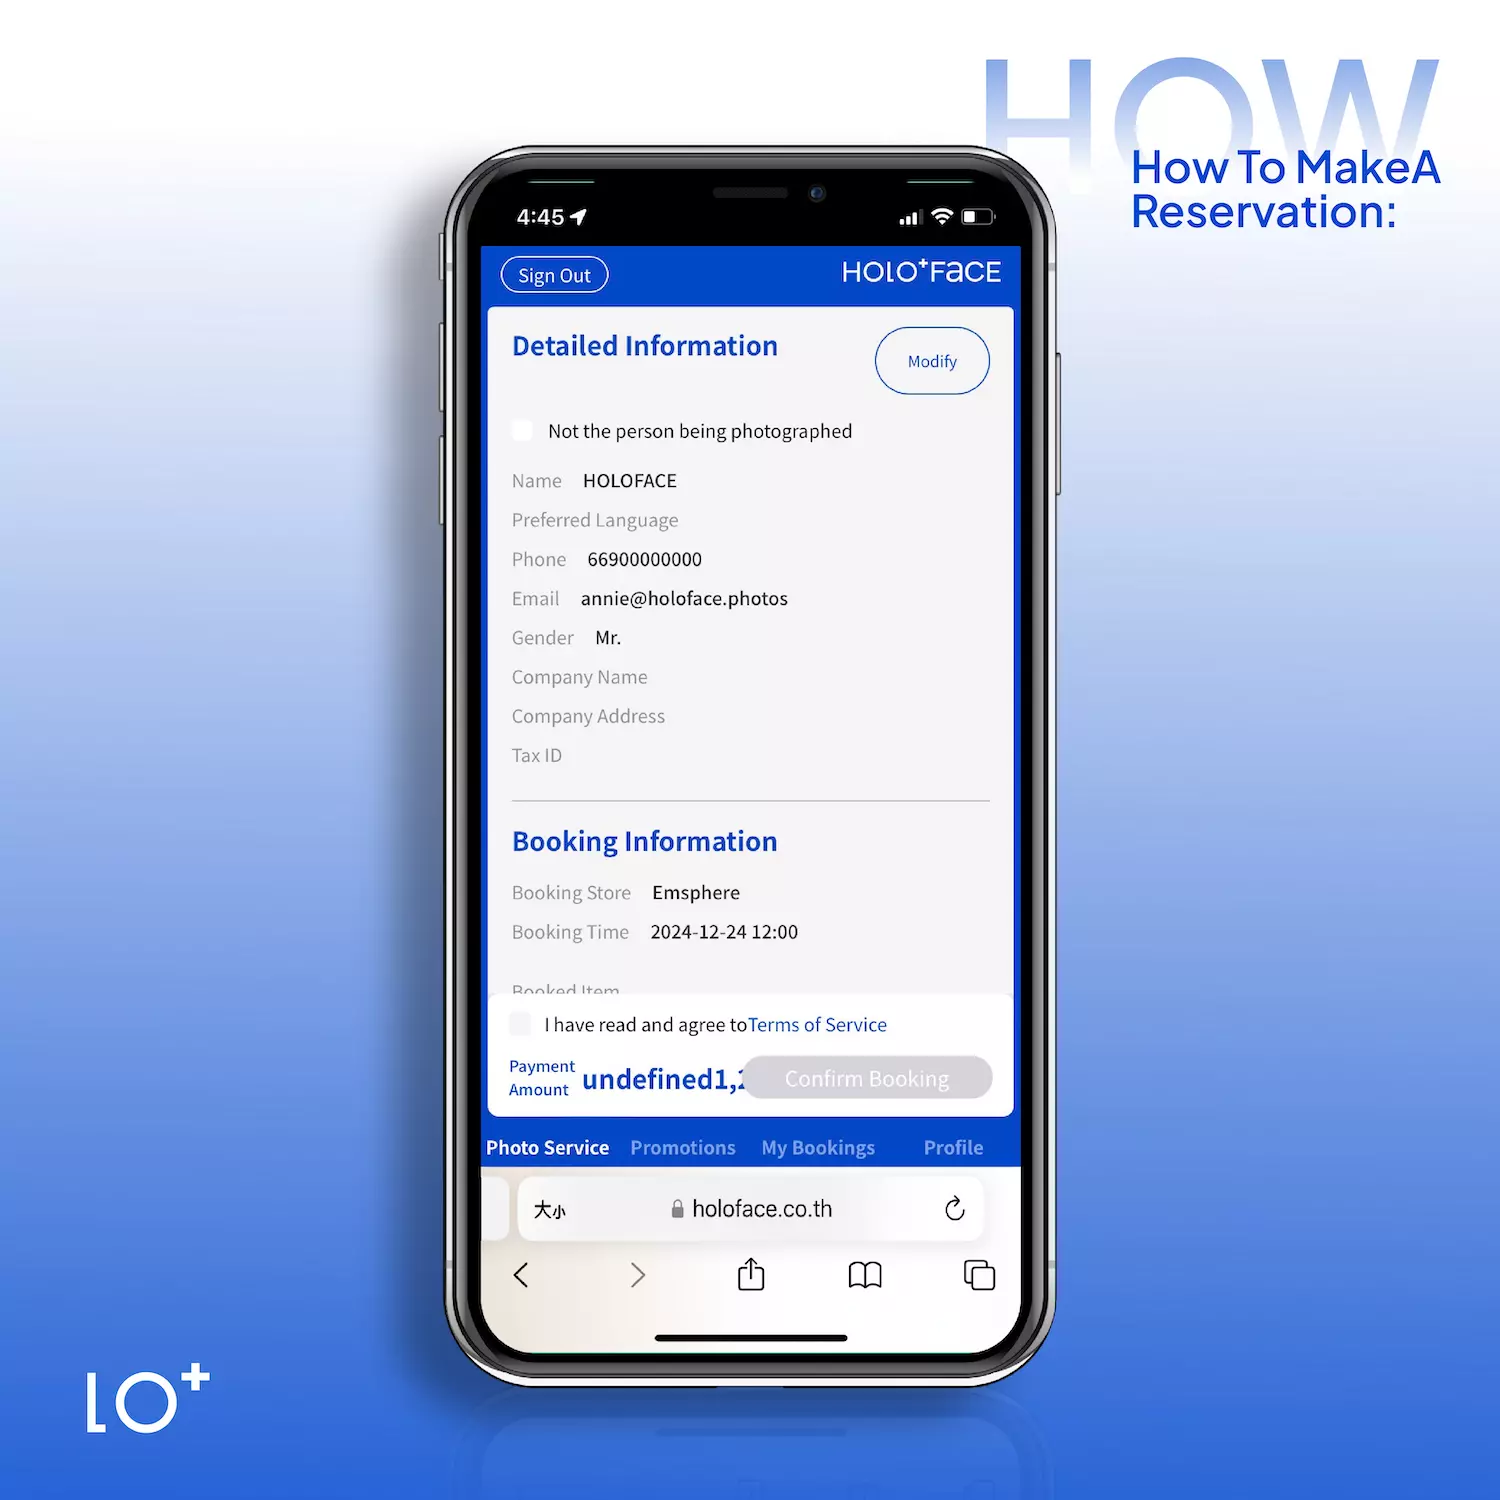
STEP 08|Review and Confirm Booking Details
Double-check the date, service, price, and other details of your booking on this page.
-
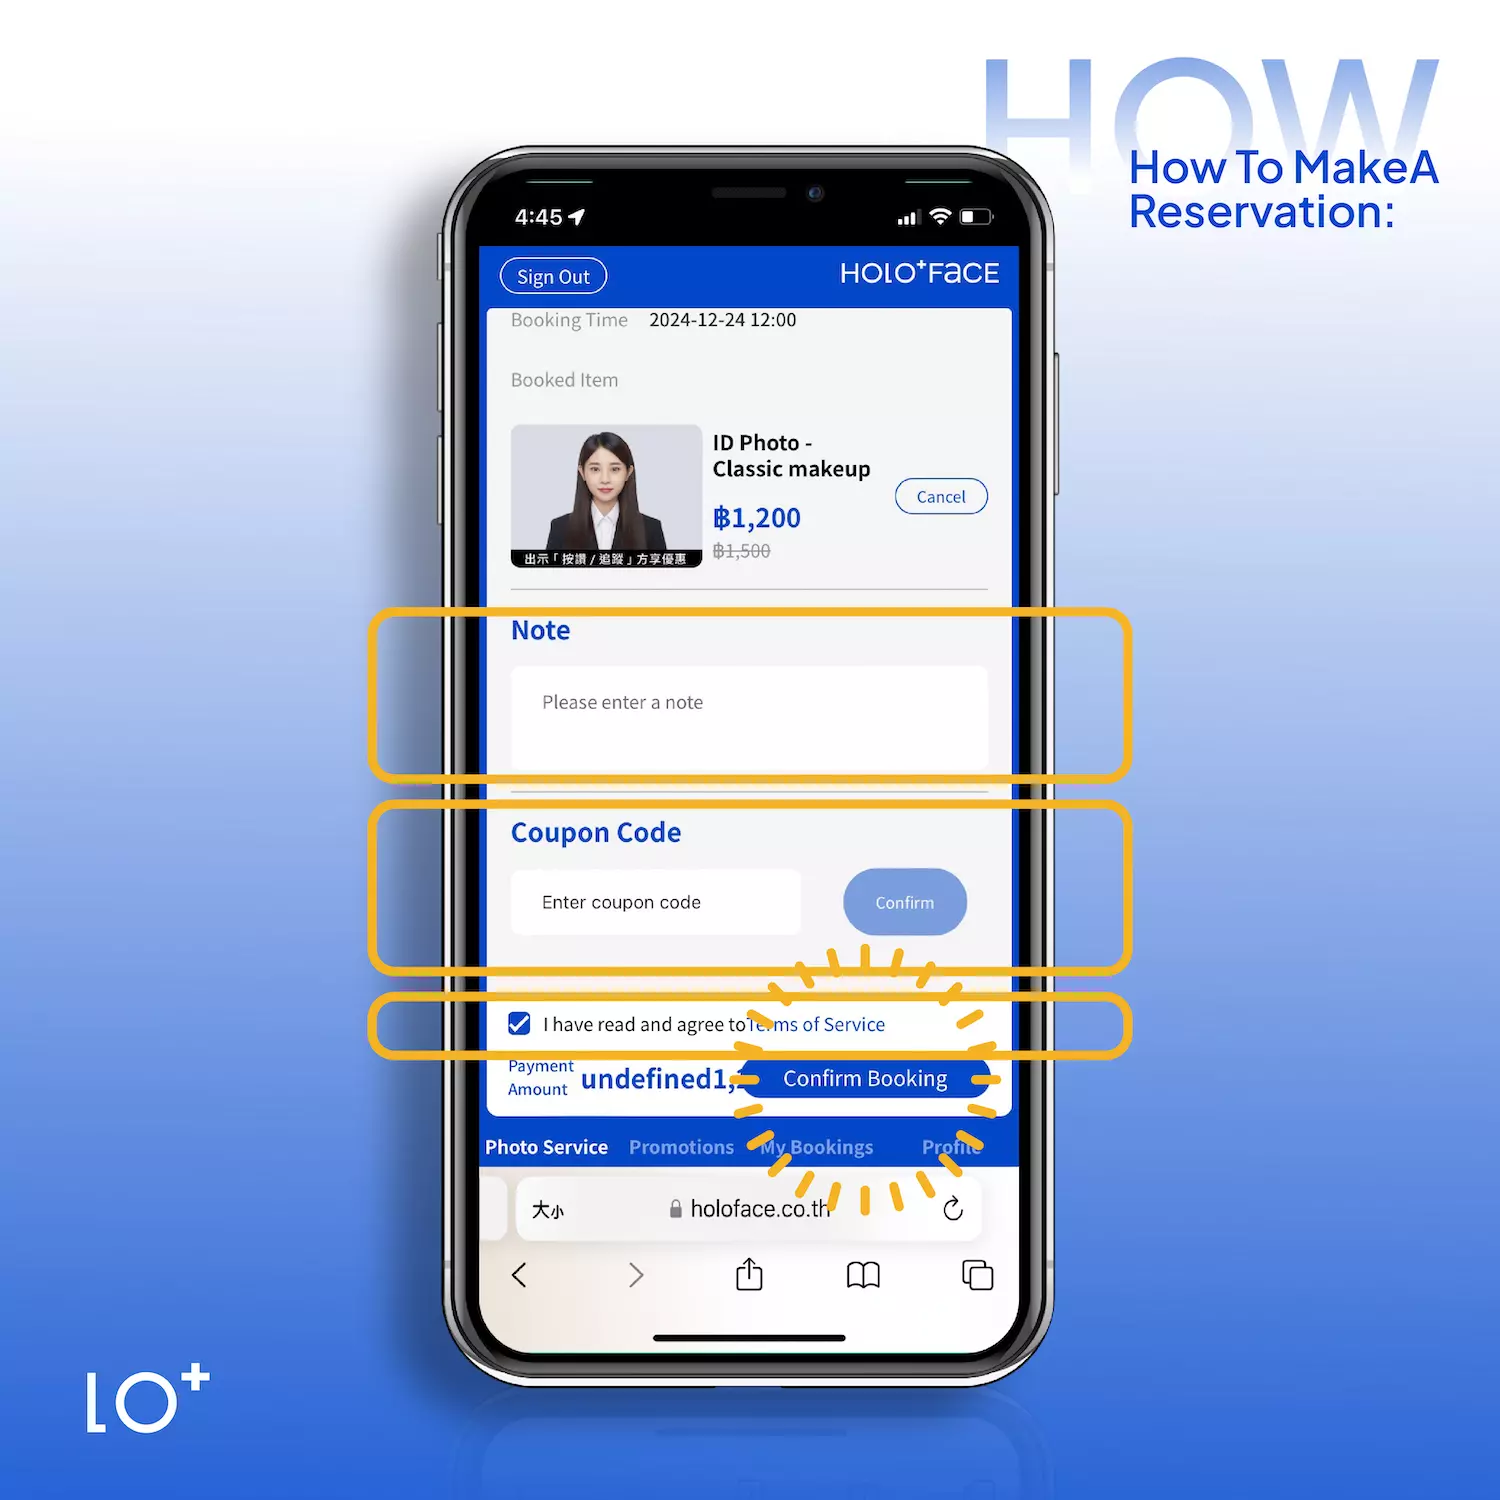
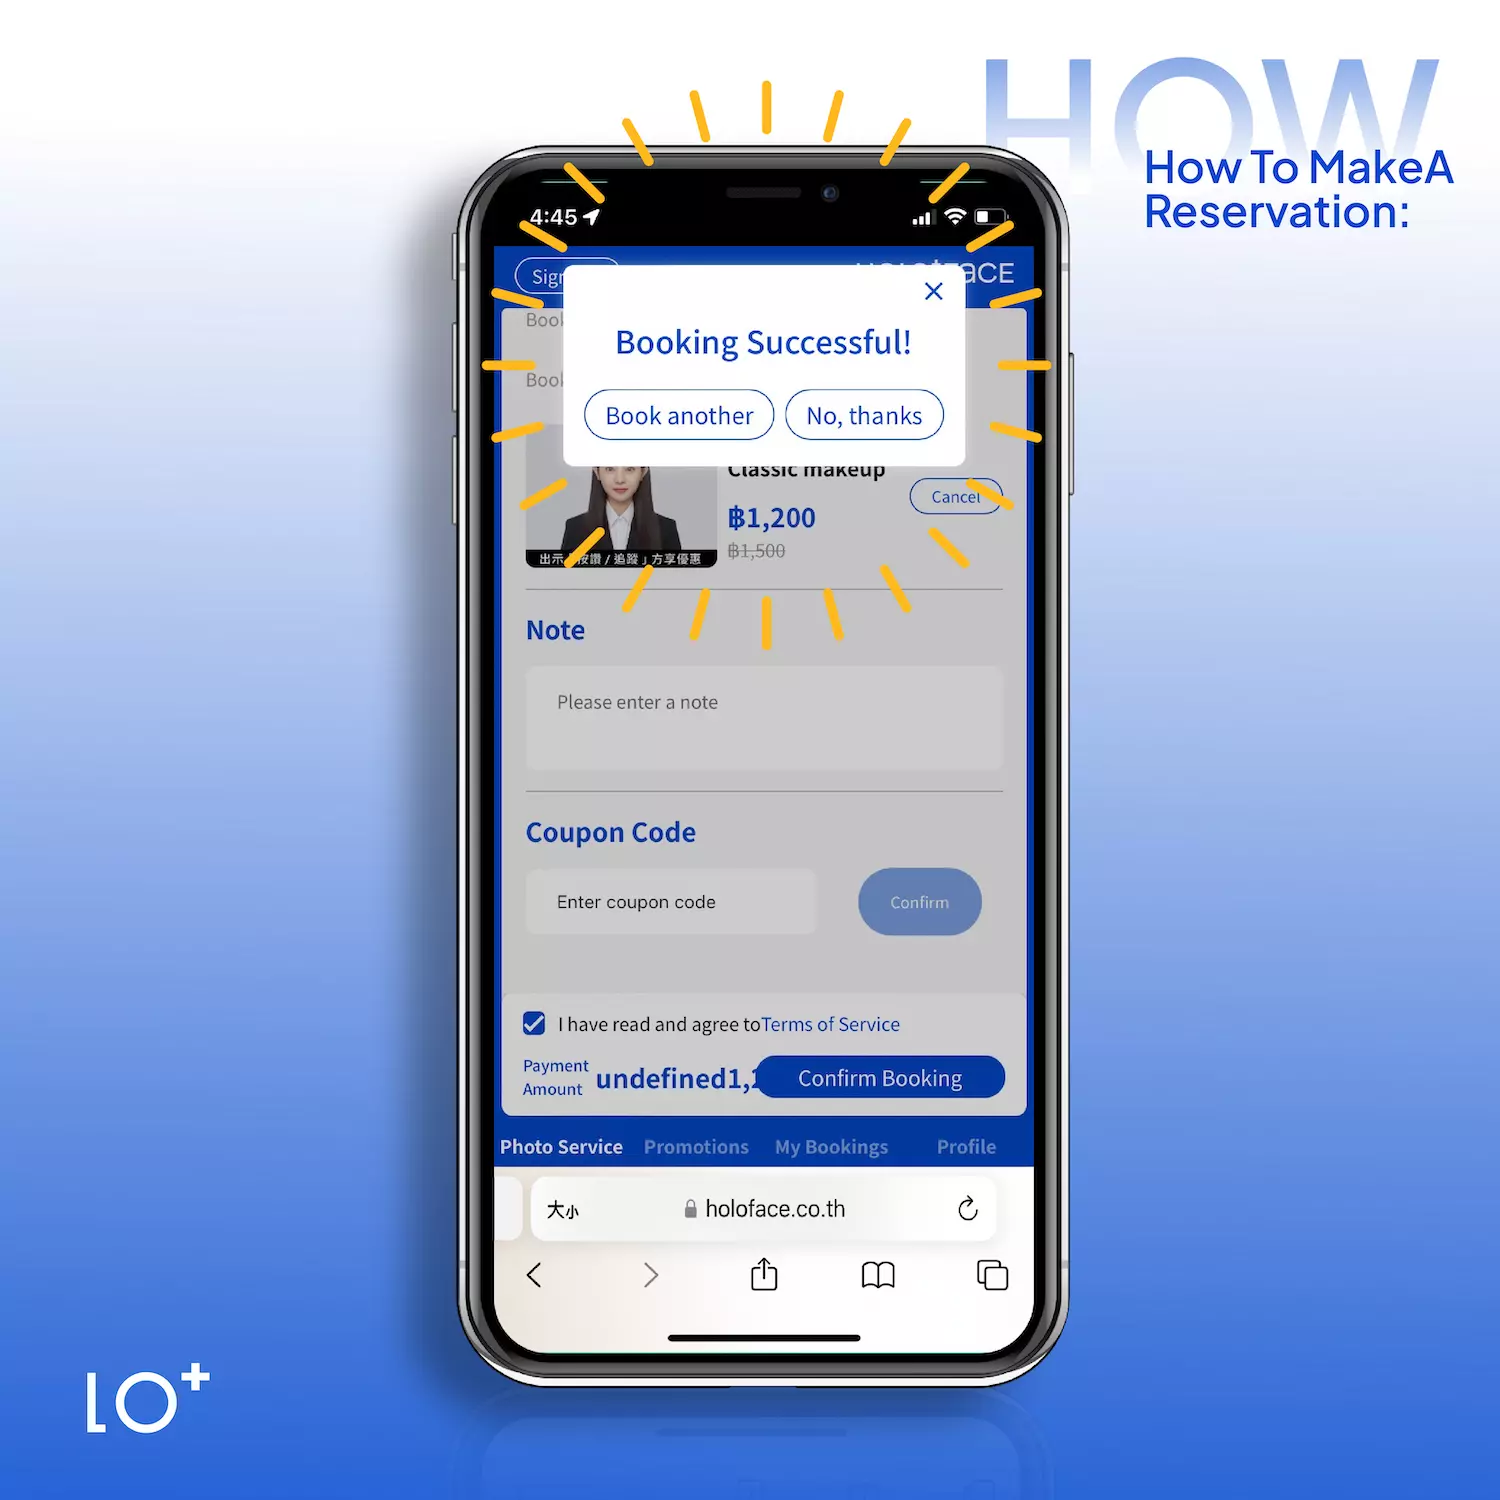
STEP 09|Final Confirmation
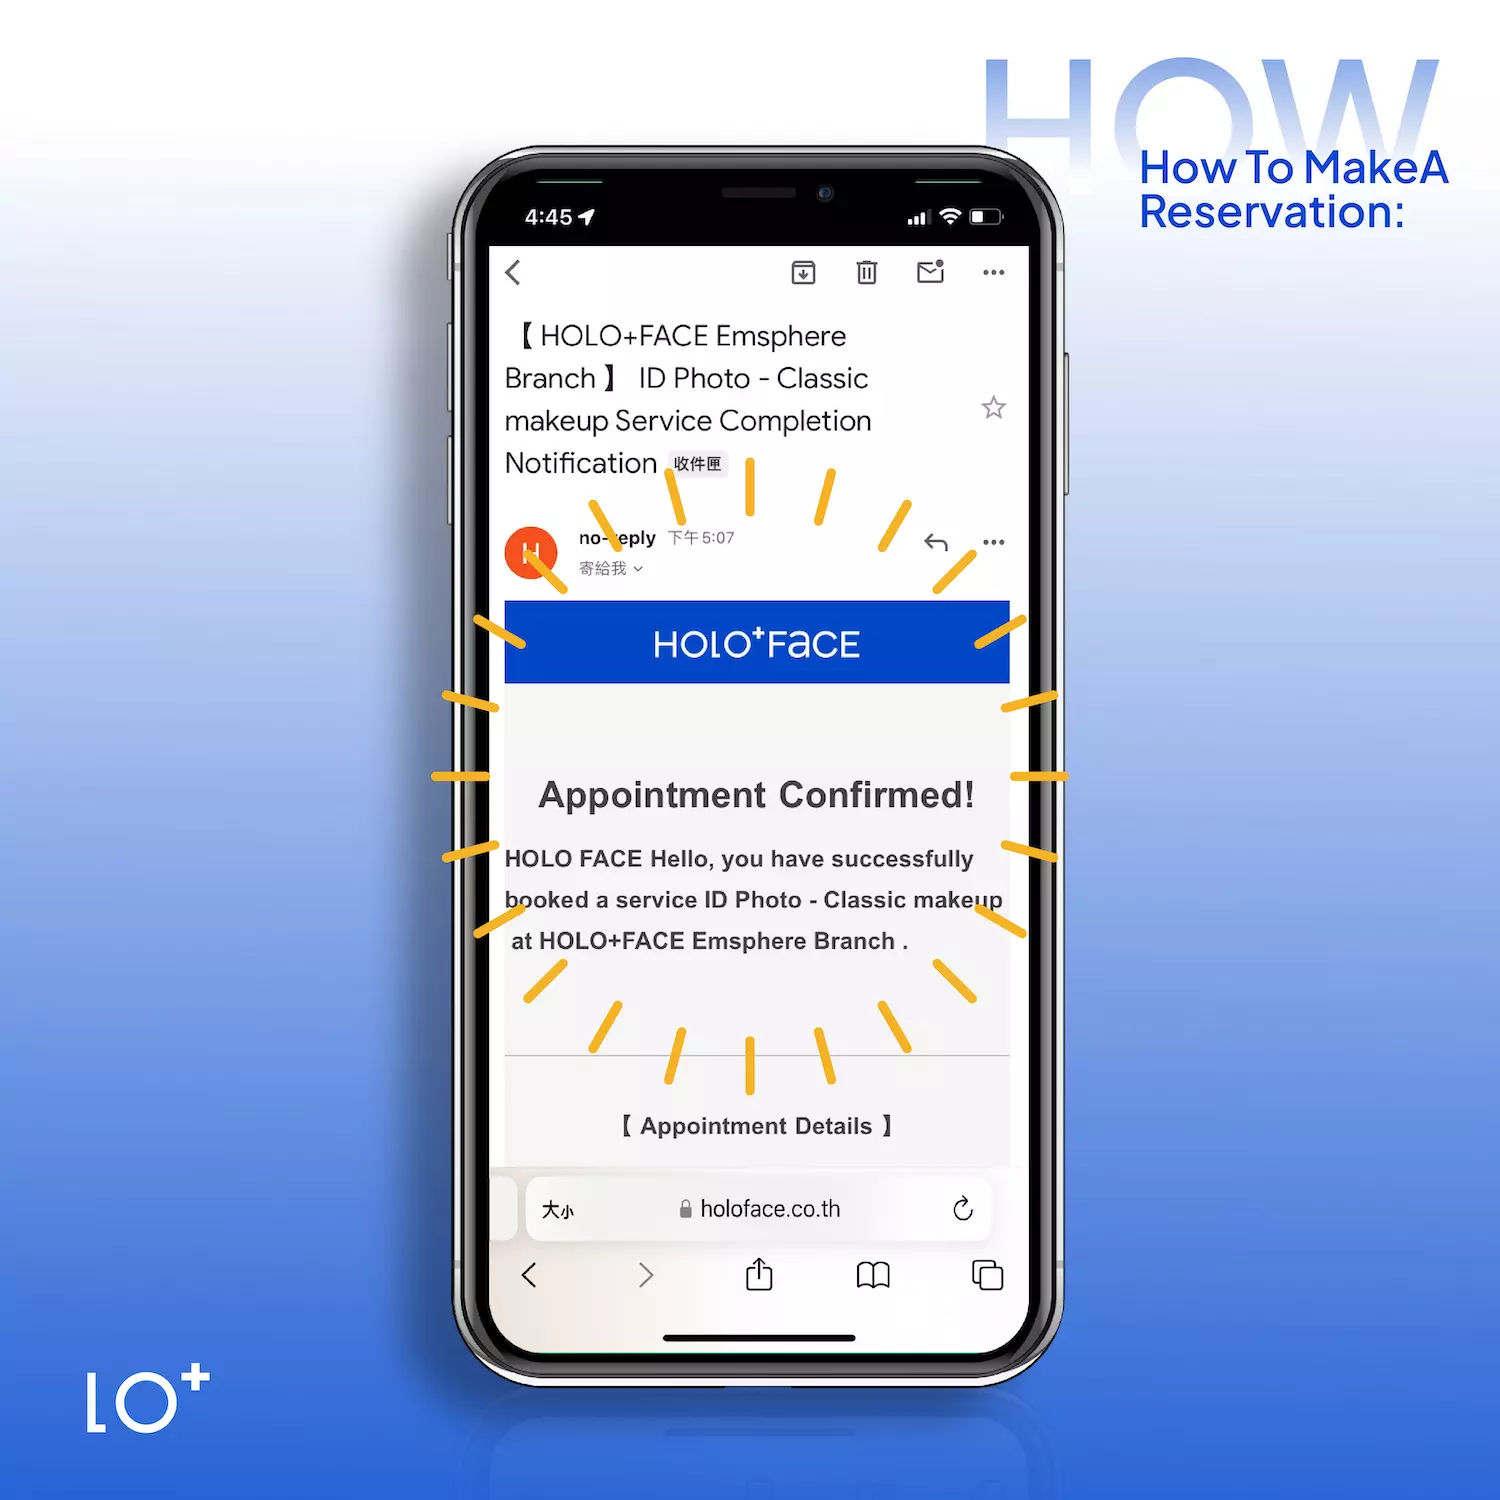
Read through the terms of service carefully, check the agreement box, and click “Confirm Booking.” Note: A booking is complete only after receiving the confirmation email.
-
STEP 10|Track Your Order
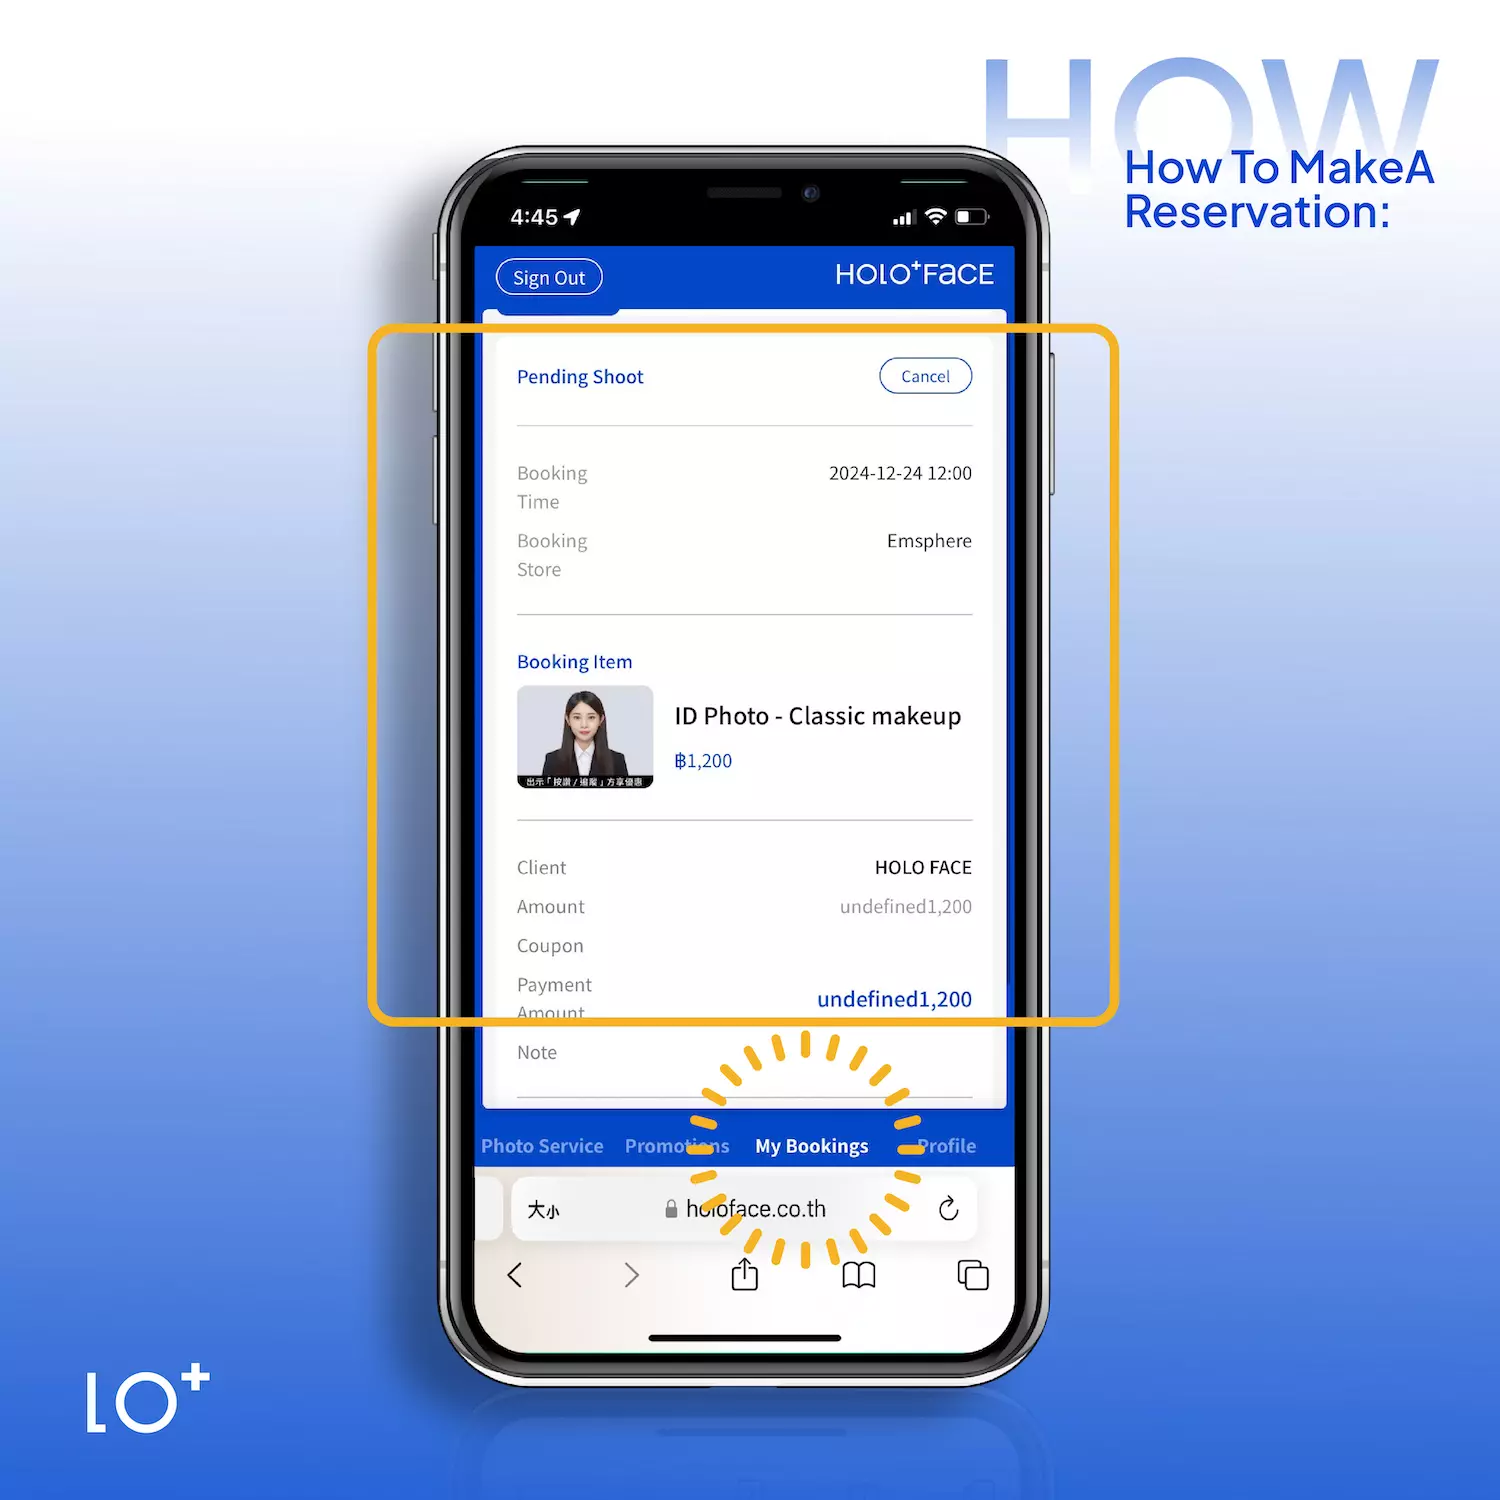
After completing your booking, you can log in anytime to track its progress, including the current status of your photo shoot.
Make sure to use the same account created during booking to view details. Access your orders through the “My Orders” tab on the navigation bar, where you can check your booking and status.
How to Cancel a Reservation ⚆_⚆
-
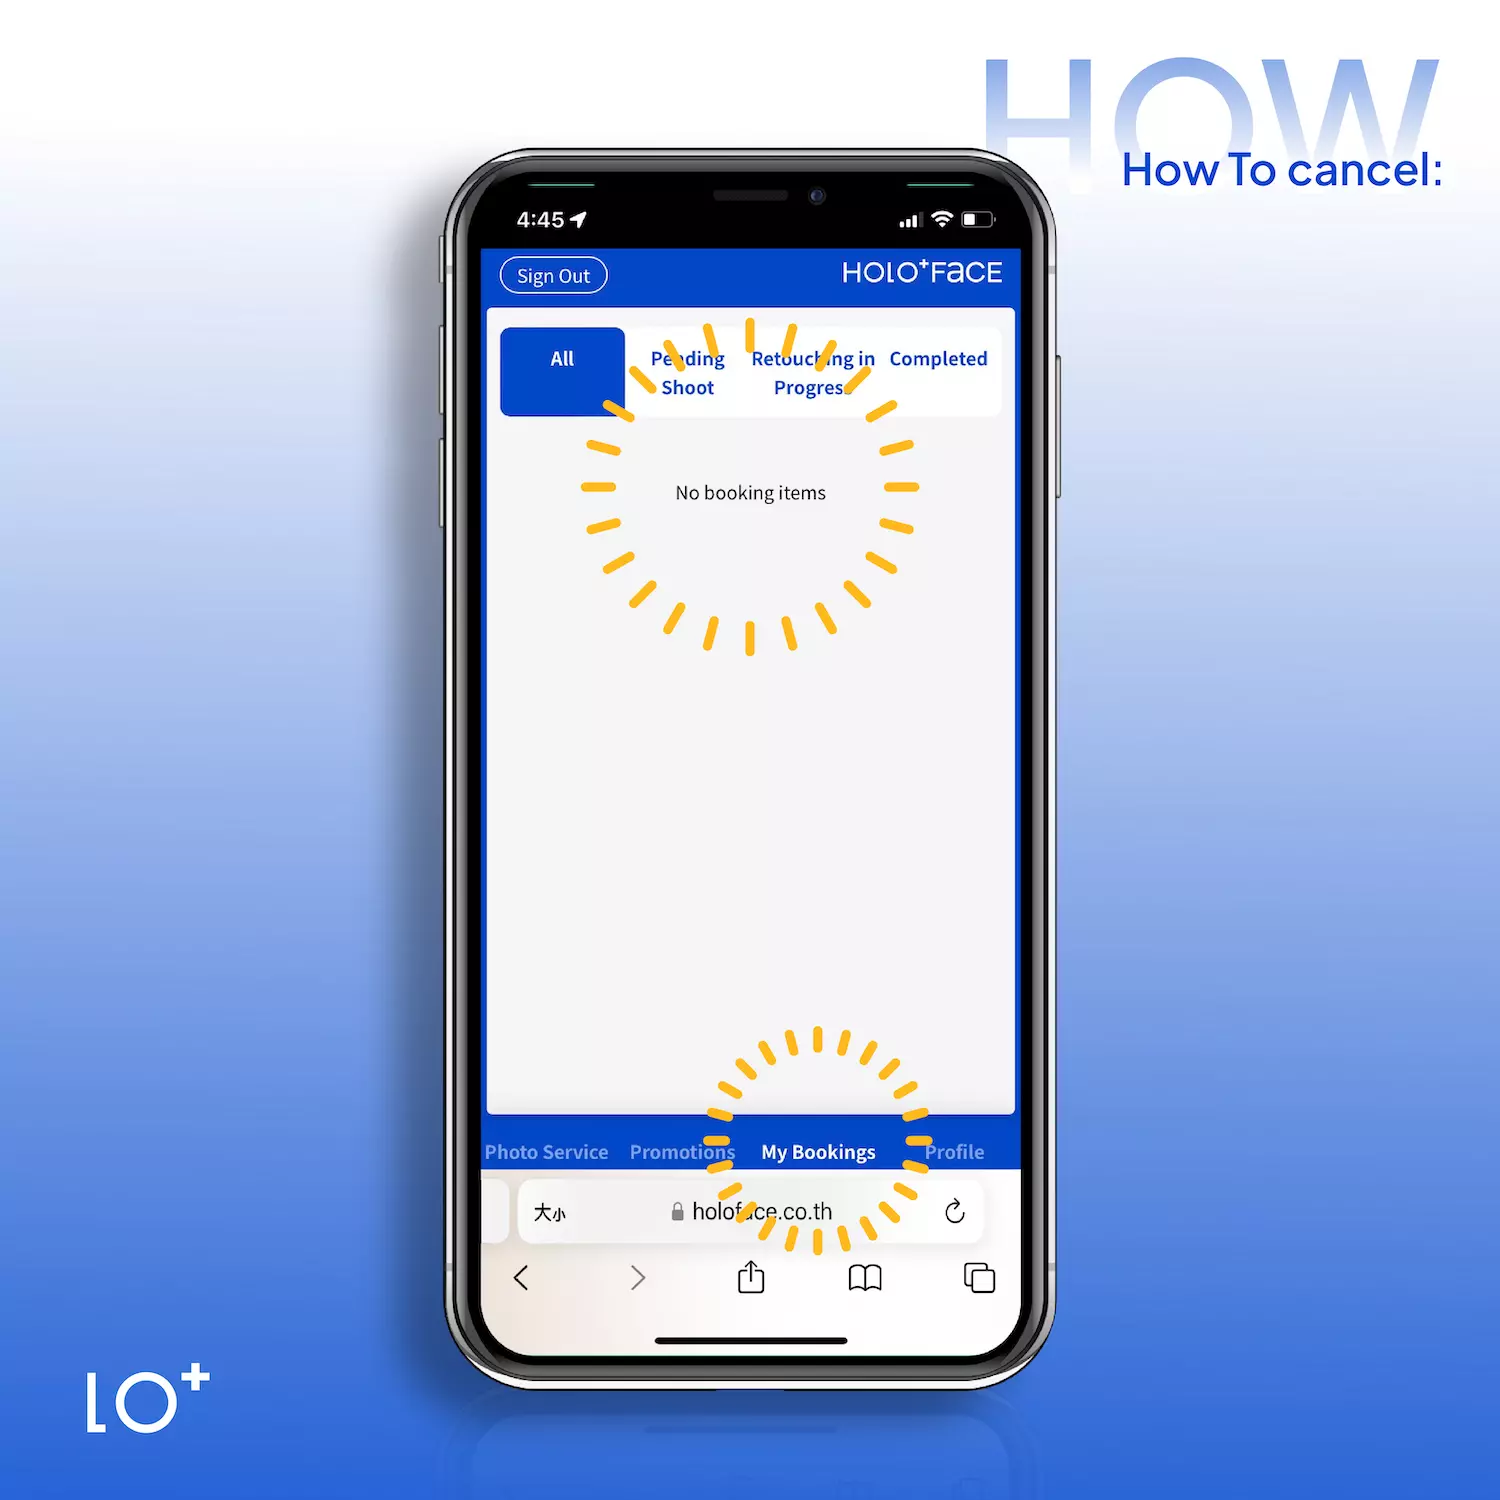
Step 01|Locate Your Reservation in “My Order”
Click “My Order” in the menu and find the reservation you want to cancel.
Or click “Pending Shoot” at the top to quickly filter all upcoming reservations.
Note: Only reservations in the “Pending Shoot” status can be canceled.
-
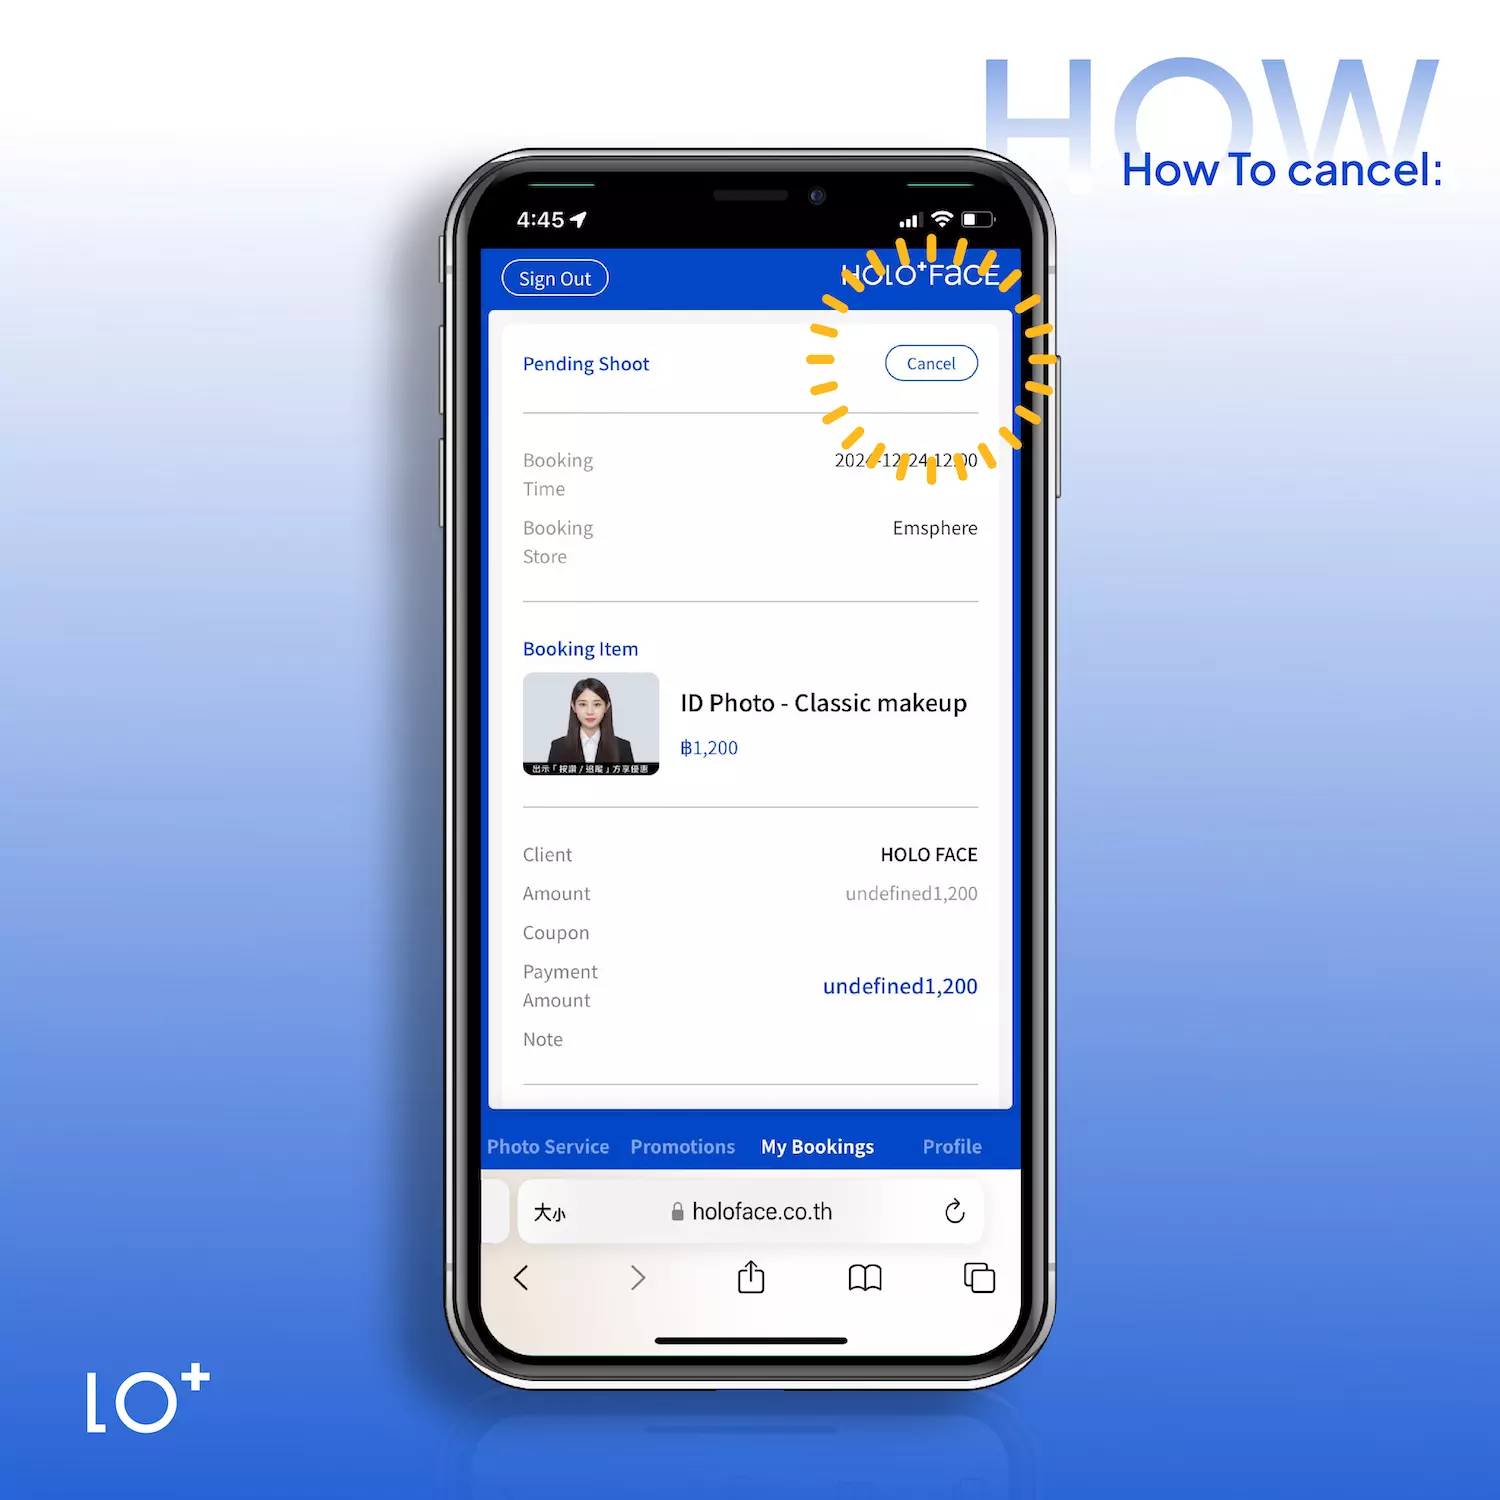
Step 02|Cancel your reservation
Click ”Cancel” button to cancel your booking.
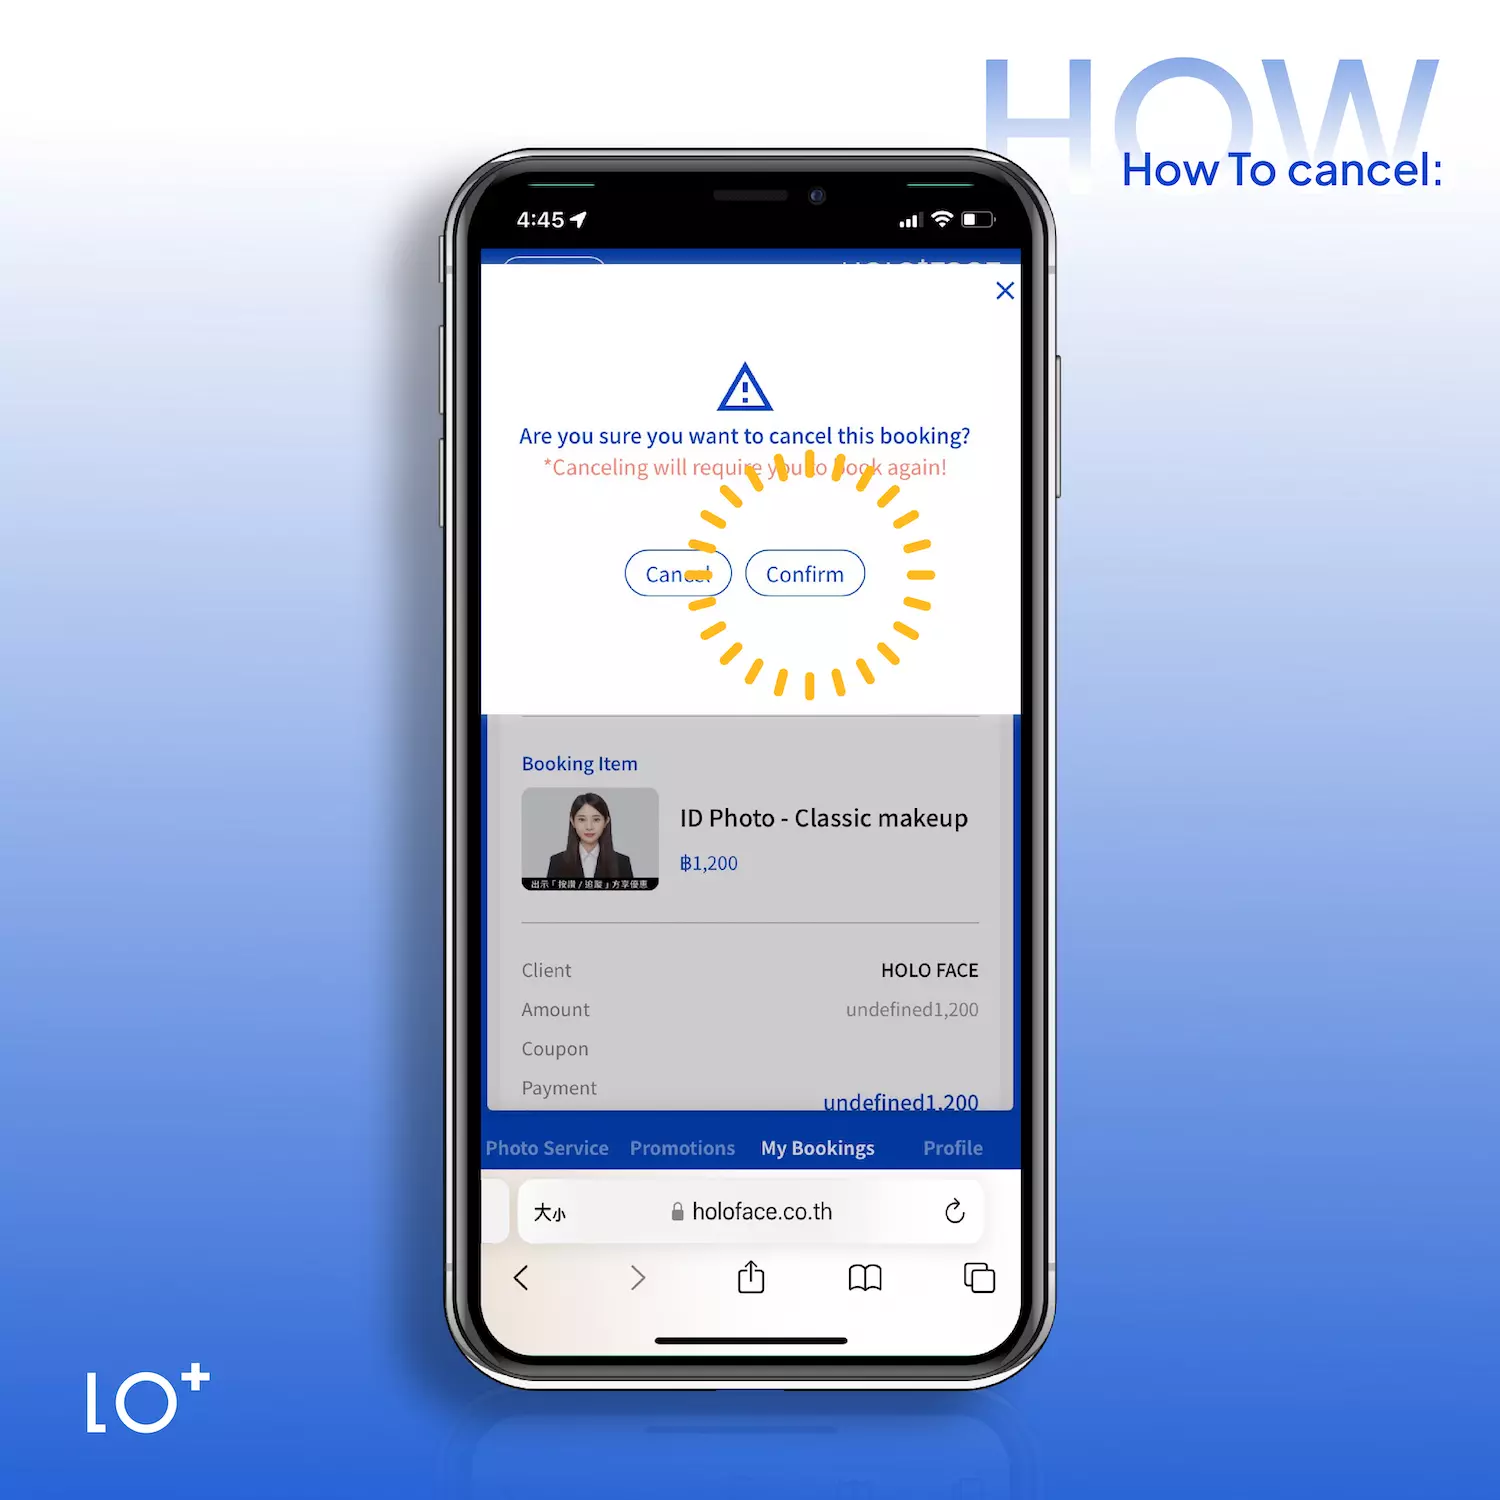
Confirm the cancellation when prompted. Once confirmed, the reservation status will change from “Pending Shoot” to “Canceled”.
QA Section ȏ.̮ȏ
-
Q: I’m struggling with the process. What should I do?
A: Don’t worry! Follow the steps outlined in this article, and you’ll complete your booking in no time.
- How to Make a Reservation ◔.̮◔✧
- How to Cancel a Reservation ⚆_⚆
If you still encounter difficulties, feel free to call the store where you’d like to book your session, and a representative will assist you. -
Q: What if I need to reschedule due to unexpected circumstances?
A: You can cancel your existing reservation and book a new time slot. Or you can call the store directly.
-
Q: Can I book a session for a family member or friend?
A: Yes, you can! Simply select the “Not the person being photographed” option during booking and provide the contact details of your family member or friend. All reminders and service communications will be sent directly to them.
If you need to book multiple sessions, please complete one booking at a time. If a time slot shows as unavailable, it means it’s fully booked.
-
Q: Can I add services to my booking, such as ID photos in addition to a headshot session?
A: Currently, online reservations allow adding ID photo services without makeup or hairstyling. For other additional services, availability depends on the situation at the studio.
If you didn’t add extra services during your online reservation, you can inquire about adding them upon arrival at the studio.
-
Q: I can’t register, log in, or I’m experiencing other issues. What should I do?
A: If you’re using the LINE app to open our links, Google or Facebook login may not work due to technical limitations of the LINE browser. We recommend using your phone’s default browser, such as Safari or Chrome, to make a reservation.
If you’ve followed the steps in this guide but still have problems, please contact the store directly for assistance.
-
Q: I can’t seem to book my desired time slot. When are new time slots released?
A: HOLO+FACE releases reservation slots daily at midnight (12:00 AM) for the same date of the following month.
For example:
- On November 1st at 12:00 AM, bookings for December 1st will open.
- On November 2nd, bookings for December 2nd will open, and so on.
If you’re aiming for a specific date, we recommend setting a reminder and refreshing the booking page at midnight one month in advance!
